Tag: trello

  • From Features to Feedback: Building My Running Training Tracker

    From Features to Feedback: Building My Running Training Tracker

    Are you working on building a digital product? Are you in the middle of your journey, sorting through all the weeds, trying to make sure that your product is functioning while also starting to think about your sales page? If you are, you’ve come to the right place.

    I’m right there with you. This week, I’ll share my progress on creating my first digital product, a Notion Running Training Tracker, with lessons and tips I’ve learned along the way. If you’re working on your own tracker, template, or creative idea, I hope my experience gives you encouragement and ideas for your build.


    Adding New Elements to the Tracker

    This week was all about building out the major features and making the tracker feel more complete.

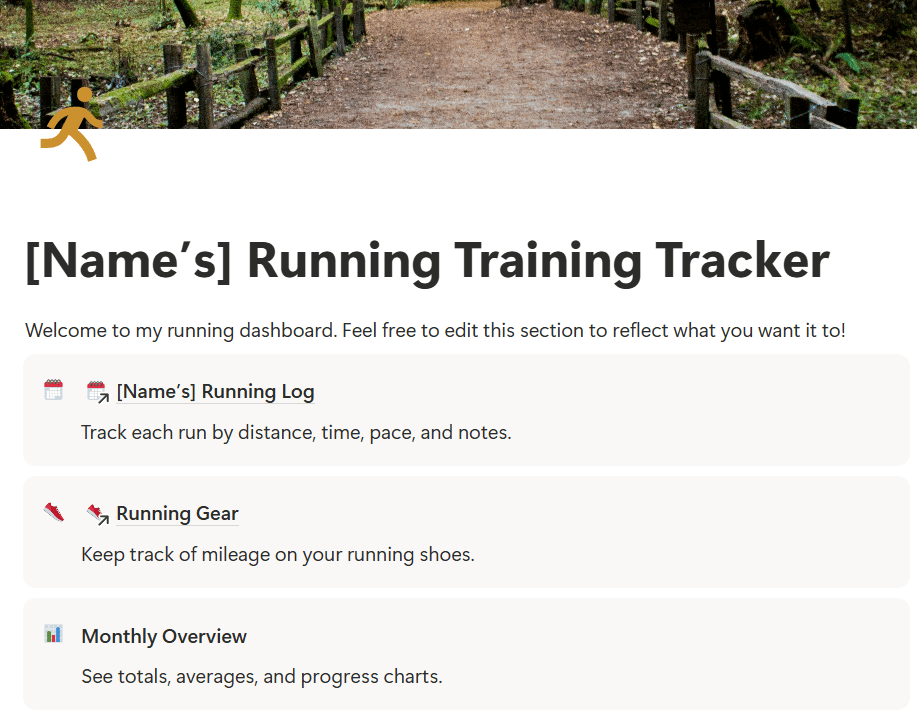
    One of the biggest updates I made was adding a personal bests (PBs) table to the running log. This way, runners can track their best times for different race distances in the same place where they log their daily runs. Keeping everything together makes the experience smoother and easier to manage.

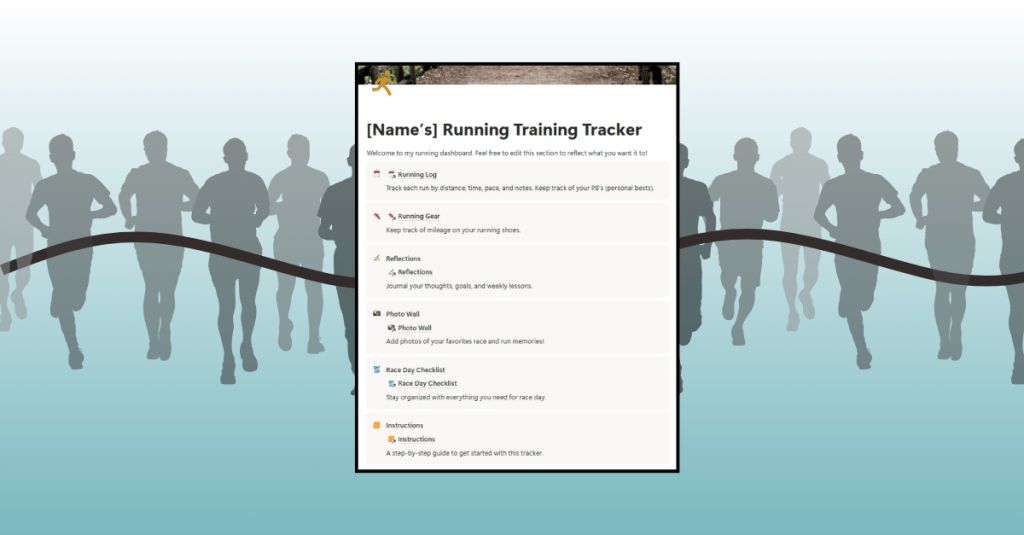
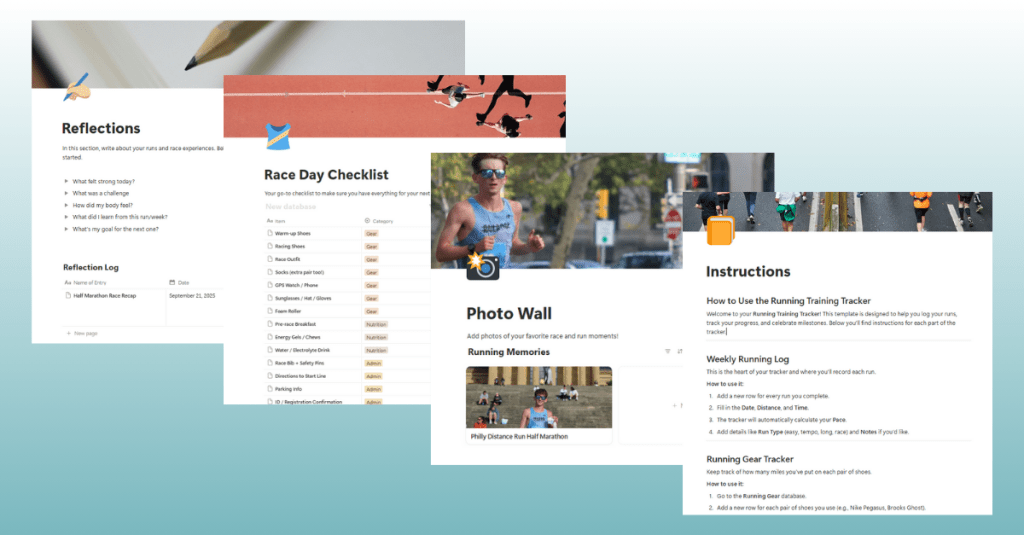
    I also built out pages for Reflections, a Photo Wall, a Race Day Checklist, and a detailed Instructions guide. Each page uses inline tables with properties like Name, Date, and Notes to keep the setup simple and flexible.

    The Photo Wall might be my favorite addition. It’s a gallery where users can upload pictures from their races or favorite runs, turning the tracker into a digital scrapbook. The Race Day Checklist is another unique piece that I haven’t seen in other trackers. It’s a practical way for runners to reduce stress before races by checking off their essentials.

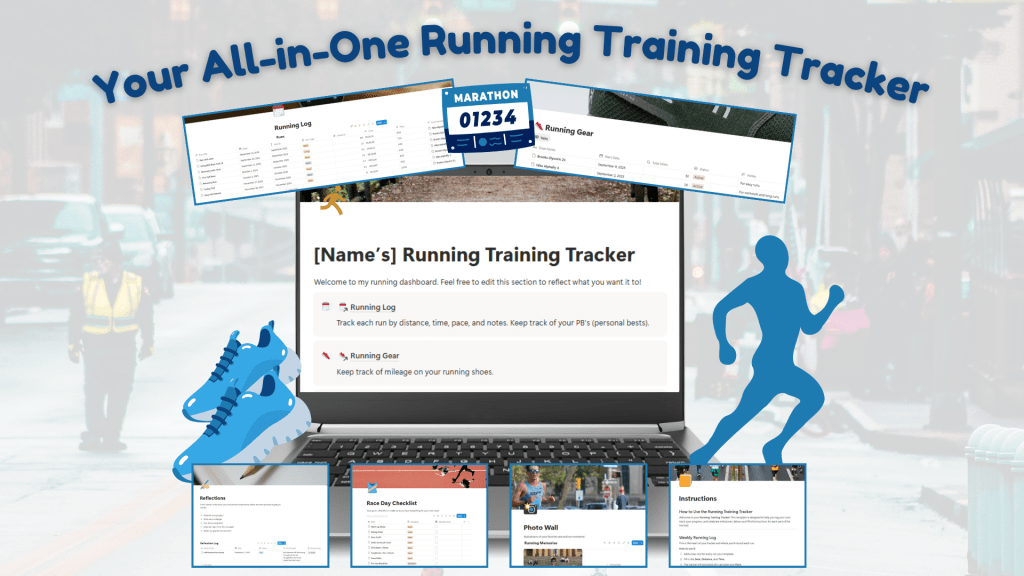
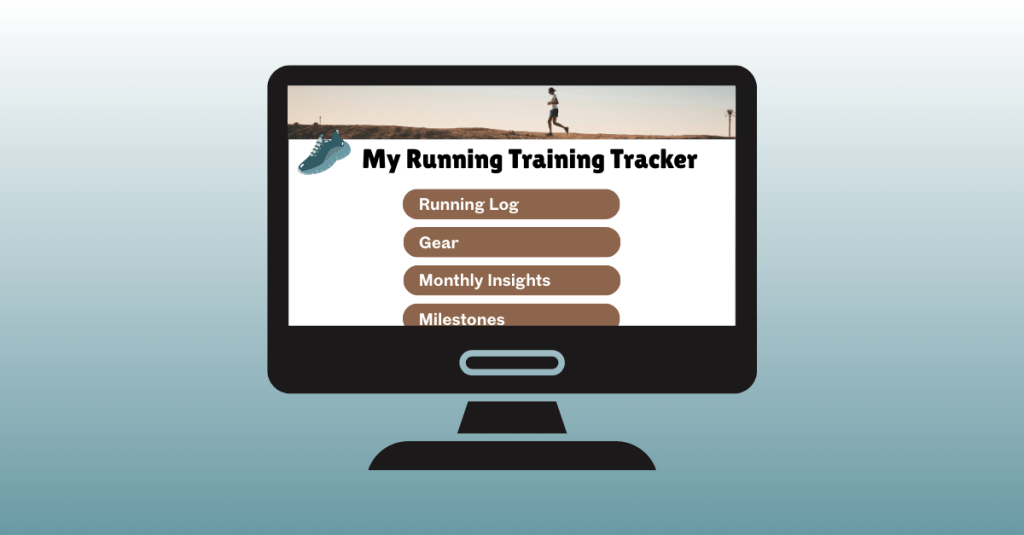
    After I built new features in the Running Training Tracker, I created Canva mockups of the product and wrote information and instructions for the sales page. Completing these tasks now makes sure that I am ready to go when I finalize the product next week.

    Click here to view my digital product journal, detailing each step I took to build my product this week.


    Hitting Snags and Finding Solutions

    Of course, it hasn’t all been smooth sailing. Building in Notion has been a constant process of trial and error.

    There were times when I read through Notion’s Help articles, felt ready to try something, and then clicked the wrong button or set up a feature incorrectly. Sometimes I had to start over because I wasn’t sure how to undo my mistake. While this was frustrating at first, it’s also what helped me learn.

    Notion is one of those platforms where experimenting is the best way to grow. Each misstep taught me something new. Using resources like Notion’s help article on galleries and their guide to inline tables gave me confidence to keep pushing forward.


    Learning From User Testing

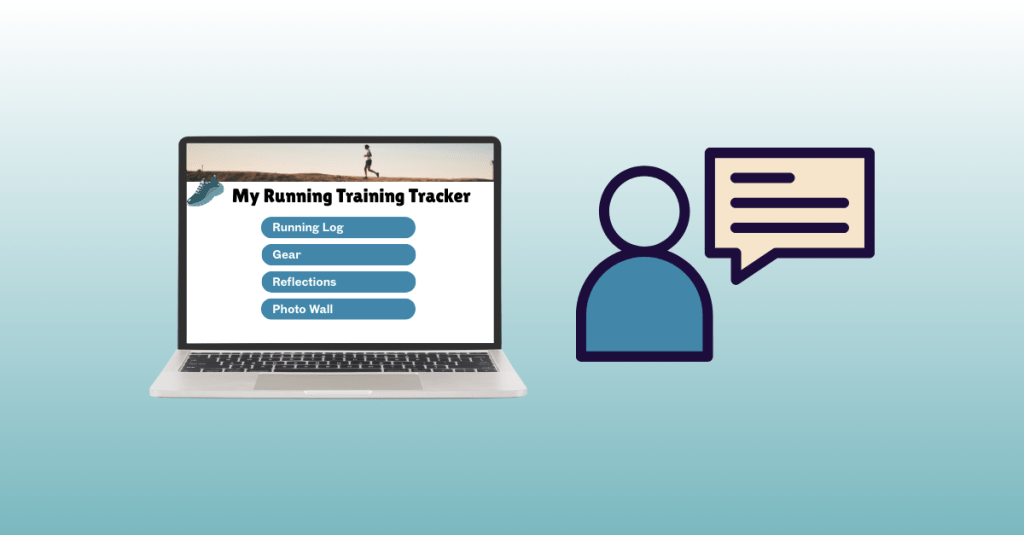
    This week I also ran my first user test. I asked another runner to try out the tracker, and their feedback was very insightful and helpful.

    They loved the Photo Wall, saying it gave the tracker personality and made it feel more personal than other tools they’ve used. They also appreciated the Race Day Checklist, pointing out how easy it is to forget something when you’re rushing around on race morning.

    Their main suggestion was to add a Monthly Overview section so they could compare mileage totals from month to month. I thought this was a great idea and plan to add it in the coming week.


    Takeaways and Lessons

    One of the biggest lessons I learned this week is how important it is to test early and often. First, test your own product to make sure all the links, formulas, and pages work. Then, bring in testers who will approach it with fresh eyes. Even one user test provided valuable insights that will make my tracker stronger.

    I also realized how important it is to proofread and polish. Small things like clear labels and clean mockups can make the difference between a product that feels professional and one that feels rushed.

    And maybe the most important lesson? Patience. Building a digital product is about trial and error. There were moments in Notion where I felt stuck or frustrated, but stepping away, looking at resources, and trying again always brought me closer to a solution.


    Wrapping Up This Week

    At this point, I’d say my Running Training Tracker is about 85 percent complete. I’ve got the major features in place and a structure that feels organized and user-friendly. Next week is all about refining. I’ll be adding the Monthly Overview feature, running more user tests, and preparing my sales page with the mockups and instructions I’ve created.

    If you’re building your own digital product, my advice is simple:

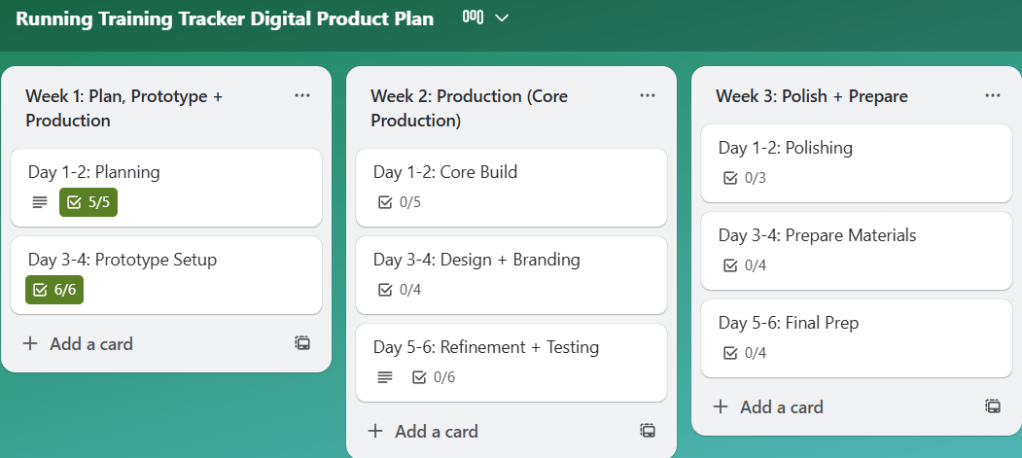
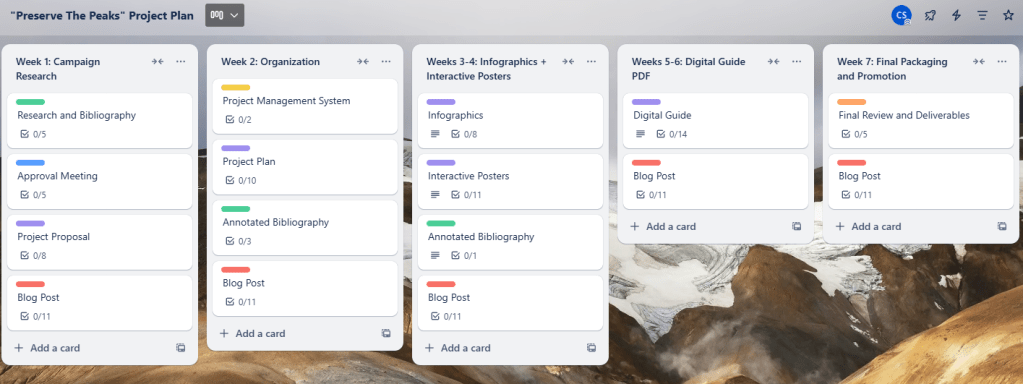
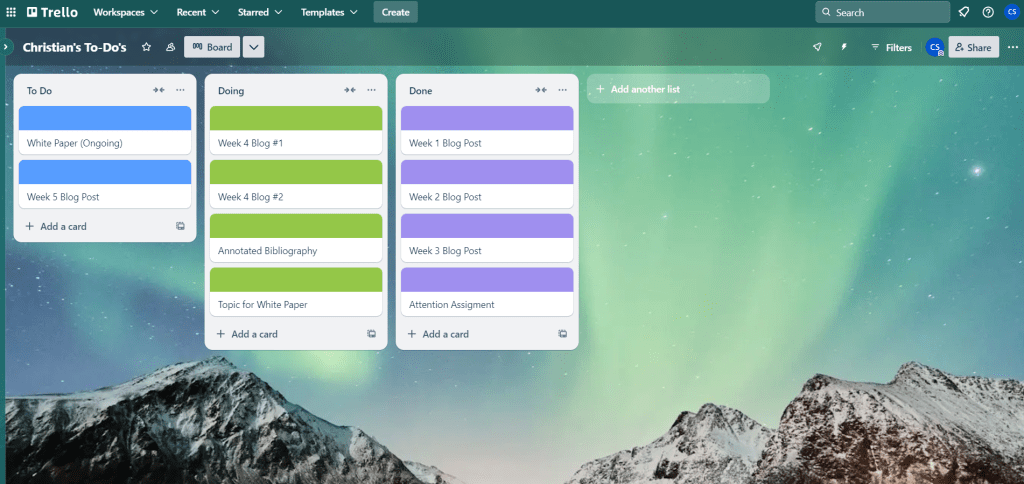
    • Use a project management tool like Trello to stay on track. Click here to view my Trello board.
    • Test, refine, and then test again.
    • Be kind to yourself through the trial and error process.

    Stay tuned as I continue building the Running Training Tracker. The journey continues, and I wish you productivity and creativity as you build your products.

  • From Idea to Action: Building My First Digital Product

    From Idea to Action: Building My First Digital Product

    Have you ever had an idea for something you wanted to create, only to realize you weren’t sure where to begin? That’s exactly how I felt when I started working on my first digital product: a running training tracker. I knew I wanted to create something useful for runners like me, but I also knew it would take planning, patience, and learning new tools along the way. This post is all about the first steps of that journey: the planning stage and the beginning of production.


    Laying the Groundwork with Planning

    Before I opened a single app, I knew I needed a plan. I created a Trello board to break the project into small, actionable tasks spread over three weeks. This helped me avoid feeling overwhelmed and gave me a roadmap to follow. Each task was sized so that I could chip away at the project consistently rather than trying to tackle everything at once.

    I also used Canva to sketch out mockups of the tracker pages. These visual drafts gave me a clearer picture of what I wanted to build before diving into the software itself.

    View my Canva mockups here.


    Choosing the Right Platform

    After researching my options, I decided to build the tracker in Notion. What drew me in was its flexibility: tables, linked databases, and the ability to connect everything in one place. I thought these features would allow me to build something robust while still being user-friendly.

    The catch? I had never used Notion before, so my first week was all about learning.


    Learning the Tools

    To get up to speed, I leaned heavily on tutorials and resources. Here are a few that helped me the most:

    I can’t overstate how important these were. At first, everything felt foreign, but after a few videos and articles, I began to see how the pieces fit together.


    Starting to Build

    When I felt more confident, I opened Notion and began building the Running Log, which is the core element of the tracker. This is where runners can enter their daily workouts, including distance, time, pace, and notes. I also added a section for Running Gear so runners can log which shoes they wore and see how many miles they’ve put on each pair.

    Click here to view the progress I’ve made on my running training tracker in Notion.

    The first 30–40% of the build is now complete. The foundation is there; what’s left are refinements, smaller features, and, eventually, testing with real runners.


    What Worked and What Didn’t

    Some tools felt like second nature. Trello and Canva were smooth sailing since I’ve used them before. Building in Notion was a different story.

    The biggest challenge? Coding formulas in Notion. For example, I wanted the tracker to calculate average pace when users enter their distance and time in “hh:mm:ss” format. It sounds simple, but formatting time in a way that Notion understands is complex. I spent a long time testing formulas, reading threads, and watching tutorials. It was frustrating at times, but I learned to be patient and keep trying different approaches until it worked.

    Another tricky area was linking databases. I set up a system where the Weekly Log connects to the Running Gear database. That way, each shoe automatically adds up the total miles logged. Getting the databases to connect to each other correctly was a learning curve, but when I figured it out, it became a game-changer.


    Reflection

    Looking back, I’m proud of the progress I made this week. Taking time to plan with Trello and mockups in Canva made the actual building phase much smoother. I also proved to myself that I could learn a new platform like Notion with enough patience and persistence.

    Next week, I’ll continue building by adding sections for PRs and Goals, building out the more simple features like the race-day checklist, refining the design, and preparing for user testing. I plan to test the tracker with family members, teammates, and running club friends to gather feedback from runners of all levels. This will help me ensure the tracker is practical, motivating, and accessible for everyone.

    Want to read more about my first week of building this product? Click here to view my production journal.


    Next Steps

    My plan moving forward is simple:

    • Finish building the must-have features of the tracker.
    • Start testing with real users.
    • Refine and brand the product before the final launch.

    This journey is already teaching me so much about building a digital product, but also about staying patient, problem-solving creatively, and breaking down big goals into manageable steps.

    And that’s what building your first digital product is really about: trial and error, showing up, learning as you go, and celebrating small wins along the way.

    Stay tuned as I continue to build the running training tracker.

  • A 101 Guide to Organizing Your Passion Project

    A 101 Guide to Organizing Your Passion Project

    You’ve got a big idea, the creative juices are flowing, and your passion project is finally taking shape. Now comes the tricky but fun part: getting organized. Whether you’re crafting a social campaign, building a website, or developing a multimedia series, staying organized will make the creative process much smoother.

    Let’s be honest: starting something new can be overwhelming. Where do you begin? How do you wrangle all your ideas into something cohesive? What tools actually help?

    Good news: I’m in the thick of this myself, and I’ve got your back. Here’s your go-to guide for organizing your passion project, featuring real tips from my experience working on “Preserve the Peaks,” a multimedia conservation campaign about Rocky Mountain National Park.


    Why Project Management Tools Are Game-Changers

    My “Preserve The Peaks” Project Plan in Trello.

    When you’re juggling tasks, ideas, deadlines, and research, using a project management system is a must. It gives you a visual structure for your work, helps you prioritize, and ensures you actually finish what you start.

    Some of the most popular tools out there include Trello, Asana, Notion, and Monday.com. Which one should you use? It all depends on your personal preferences and project style. Explore the features of each, and see which fits your organization style best.

    I chose Trello for my campaign. I love the card-based system, which lets me:

    • Create task checklists (there’s nothing more satisfying than checking something off)
    • Set due dates
    • Assign collaborators
    • Attach images and resources
    • Leave notes and updates

    For “Preserve the Peaks,” I divided my Trello board into sections by week and topic. Here’s a glimpse into how I broke it down:

    • Week 1: Research
    • Week 2: Organization
    • Weeks 3–4: Infographics and interactive posters
    • Weeks 5–6: Digital guide (PDF)
    • Week 7: Final packaging and project promotion

    Within each section, I created individual task cards and broke them into bite-sized and actionable to-do lists. The more detailed your checklists, the easier it is to stay on track.


    Mastering the Art of Annotated Bibliographies

    When your project management system is up and running, it’s time to dig into your research. You’ve probably already gathered sources, which is great! Now comes the part where you actually make sense of them.

    Start annotating your bibliography. For each source, write a few short paragraphs answering:

    • What is the source about?
    • Why is it important to your project?
    • How will you use the information?

    This make your research easier to reference later and also gives you a clearer picture of the themes and takeaways you want to emphasize.

    Some of the resources I used include:

    There are plenty of great resources out there on how to write an annotated bibliography if you want a template or tips!


    Creating a Project Plan That Works for You

    You’ve got your management tool. Your research is being annotated. Now it’s time to bring it all together in a clean, strategic project plan.

    Here’s what I included in my project plan:

    1. Project Management Approach: A quick overview of what platform I’m using (Trello) and how I’ve structured my boards and cards.
    2. Week-by-Week Action Plan: Each week has a clear focus with tasks tied to it, making progress feel achievable and steady.
    3. Visuals & Screenshots: Including screenshots of my Trello board helped make the plan more dynamic and transparent.

    Design your plan to match the tone of your campaign. Mine features the earthy, natural tones of the Rockies and a clean layout that’s easy to navigate. Treat it like an extension of your brand, and it will set the tone for the rest of your work.


    Let’s Get Creating

    Organization might not sound glamorous, but it’s the secret sauce to making your ideas a reality. By using tools that work for you, breaking tasks down into actionable items, and making sense of your research, you’re setting yourself up for success.

    I’ll be diving into infographic design next week. Stay tuned as I bring “Preserve the Peaks” to life!

  • Taming the Chaos: How I Find Structure in a Fast-Paced World

    Taming the Chaos: How I Find Structure in a Fast-Paced World

    Does anyone else feel like getting organized is impossible? Like as soon as you finish one task, another one pops up, leaving you feeling like you can never catch a break? Getting organized is tough—sometimes the hardest part is just figuring out where to start. In today’s fast-paced world, it’s easy to lose track of everything—work projects, personal tasks, school assignments. Most of the time, I rely on the old-school method of jotting down tasks in a notebook, especially for work and school. At work, I keep a daily list and check off each task when completed, which always feels satisfying. I did the same during my undergraduate years.

    Recently, I was introduced to digital project management systems, tools designed to plan and organize projects more efficiently. As a visual learner, I knew I wanted a system that would not only help me stay organized but also present my projects in a creative, visually appealing way. After exploring options like Asana, Podio, and Trello, I decided to go with Trello. It stood out because of its customizable visual interface—who doesn’t love fun colors and images?

    When I set up my Trello board, I used a simple structure with three sections: To-Do, Doing, and Done. This method allows me to see what I’ve already accomplished, focus on the most pressing tasks, and plan for the future. This structure keeps me from feeling overwhelmed, as it helps me focus on one task at a time. Instead of jumping between multiple projects and draining my mental energy, something Johann Hari discusses in Stolen Focus: Why You Can’t Pay Attention – and How to Think Deeply Again, I tackle each task one by one.

    Because I’m a designer and love working with color, I customized my Trello board using my favorite colors to visually break up each section. For the background, I chose an image of the Northern Lights, which speaks to my love for nature and the outdoors. Incorporating these elements made the system feel more personal and enjoyable to use. So far, I’ve set up my board to organize my school tasks, but I plan to expand it to include both work and personal projects as well.

    I’m also applying a key piece of advice from Jennifer Whitt, Director of ProjectManager.com, who talks about the importance of collaboration at every stage of a project, from brainstorming to execution. Once I expand my Trello board to include work-related tasks, I plan to share it with my boss and co-workers so they can stay updated on my current workload. This way, as a team, we can hopefully stay organized and complete our work in a more efficient way.

    Getting organized is the hard part, but once everything is in place, it makes a world of difference. This is a great beginning step, and I’m excited to continue to explore other ways to organize my daily tasks.