Tag: design-sprint

  • The Final Kick: How to Crush the Last Phase of Your Design Sprint

    The Final Kick: How to Crush the Last Phase of Your Design Sprint

    The finish line is in sight.

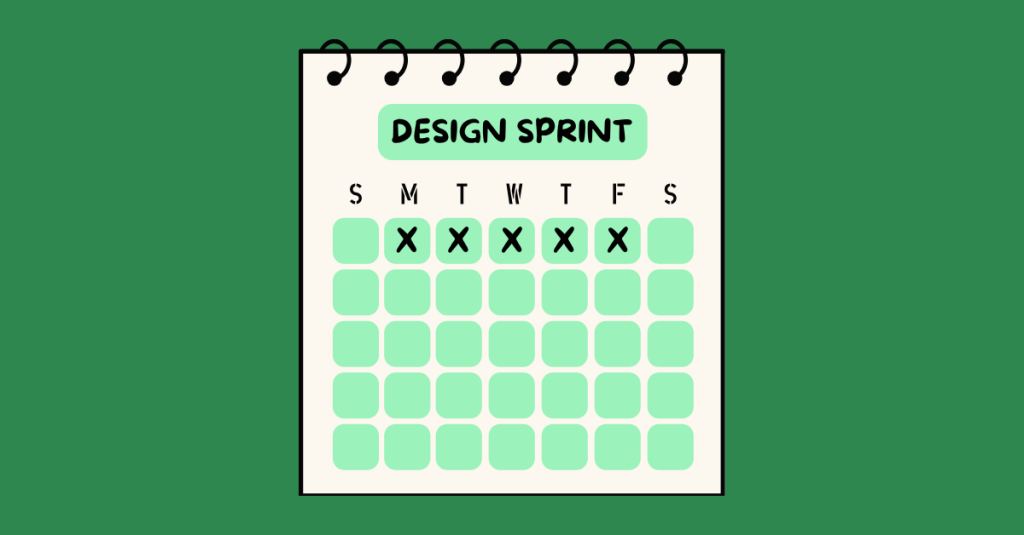
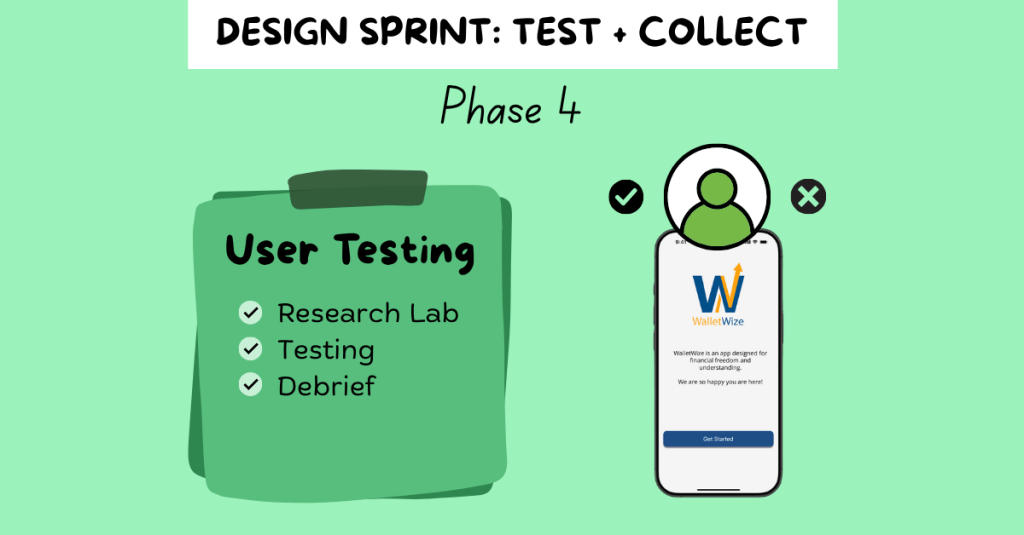
    After days of brainstorming, building, and refining, you’re approaching the last stretch of the Design Sprint. Just like the final leg of a race, it’s time to dig deep, make informed decisions, and sprint through the tape. Welcome to Phase 4: Test + Collect, where your prototype meets the real world and real users.

    “The ‘Test’ phase is the moment of truth in your Sprint journey. This is where your prototype faces the ultimate test — real-world user interaction and feedback.”

    Pattie Belle Hastings

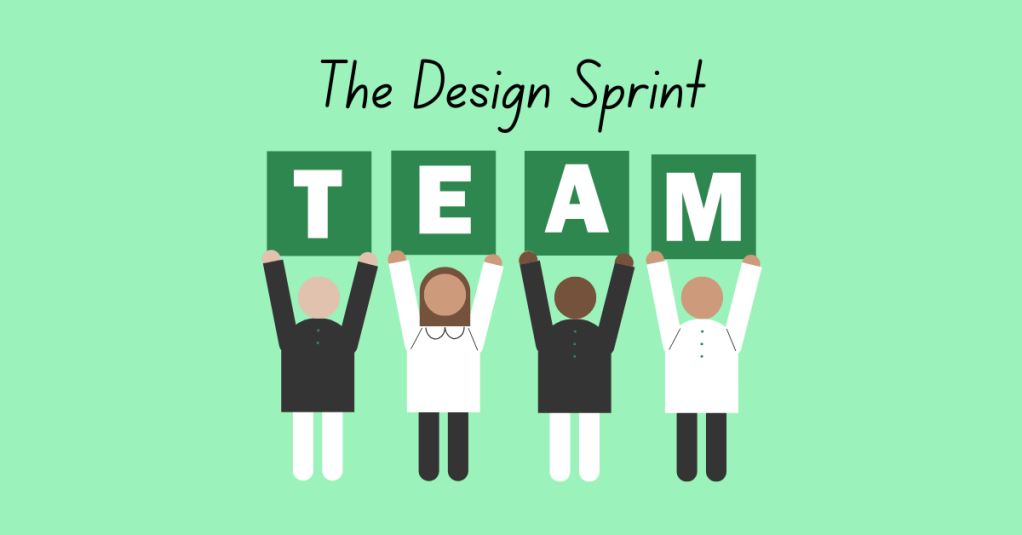
    This week, my team entered the user testing phase of our digital prototype. It’s a nerve-wracking but rewarding part of the process. You finally get to see how users interact with the solution you’ve been working hard to create.

    Let’s break it all down so you can feel confident as you enter the final stages of your Design Sprint.


    Step 1: Research Lab

    Before jumping into user interviews, take time to prepare the environment for testing. In The Sprint Handbook: A Step-by-Step Guide to Planning and Running Innovation Sprints, Pattie Belle Hastings refers to this as the “Research Lab” phase.

    Here’s how to successfully prepare for user testing:

    • Define your target audience: Who is your prototype for? Be specific. The more tailored your users, the more valuable the feedback.
    • Determine number of participants: In Sprint: How to Solve Big Problems and Test New Ideas in Just Five Days, Jake Knapp, John Zeratsky, and Braden Kowitz recommend five participants. Why? It’s the sweet spot where patterns emerge without overwhelming your team.
    • Create a recruitment plan: Be clear and transparent. Reach out, explain what’s involved, and ask if they’re open to participating.
    • Handle the paperwork: If your tests are recorded, especially virtual ones, always send consent forms. Make sure participants understand it’s voluntary.
    • Schedule wisely: Confirm dates and times with your users. A defined schedule helps everyone feel prepared and respected.

    The moral of the story? Communicate, communicate, communicate with your user testers before starting the interviews.


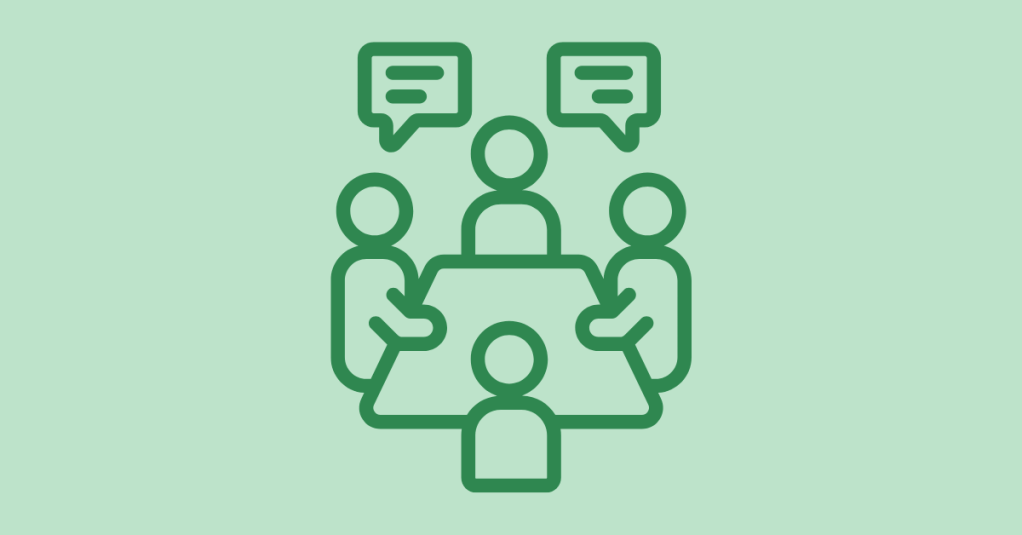
    Step 2: Conduct the Interviews

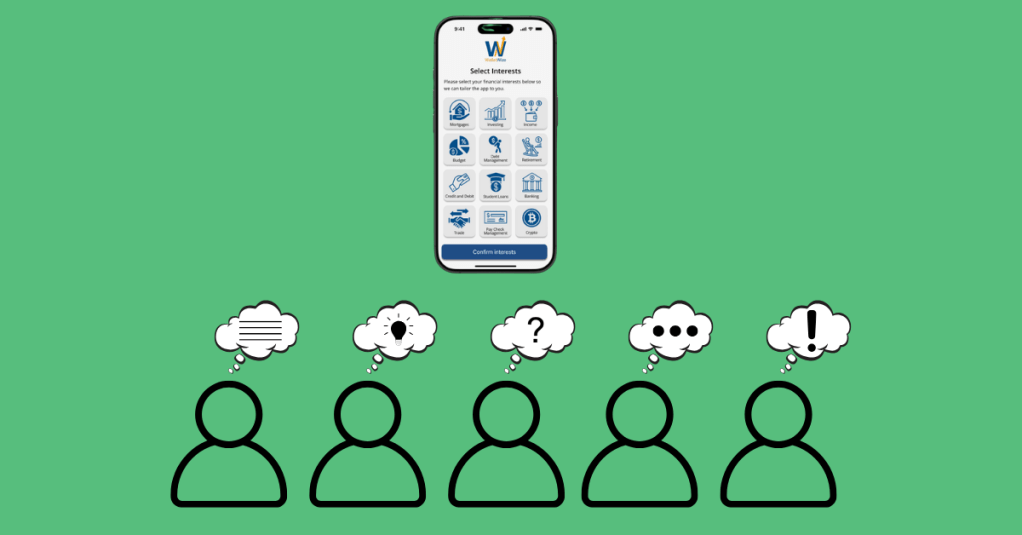
    Now that your team is prepared, it’s time for the interviews. This is where the magic happens, and where things can get emotional.

    “These interviews are an emotional roller coaster. When customers get confused by your prototype, you’ll be frustrated. If they don’t care about your new ideas, you’ll be disappointed. But when they complete a difficult task…you will be elated.”

    Jake Knapp, John Zeratsky, and Braden Kowitz

    User Scripts

    To keep things on track, follow a user script. This script keeps your team consistent and avoids giving the participants hints. The goal is to observe their authentic reactions and not guide them to the “right” answer.

    Knapp and his team suggest to start the user interviews with a friendly welcome to make the participant feel comfortable and at ease. Make sure to tell them that you are testing the prototype and not them. Ask open-ended background questions to learn about their experience and built trust. Introduce the prototype and present the tasks in a clear manner without giving hints. It’s important to end with a debrief and let the users reflect. Ask what they liked, what didn’t work, and how they would improve it. This uncensored feedback is gold.

    Tip: Stay Neutral and Curious

    Watching users struggle with your prototype can be hard. But that’s the point: your job isn’t to defend your work; it’s to learn from it.

    Here are some tips for a productive testing session:

    • Stay calm, even when users are confused.
    • Avoid giving explanations or answering questions they might have about completing a task.
    • Ask open-ended questions like:
      • “Why did you click there?”
      • “How did that feature make you feel?”

    Encourage participants to think out loud and resist the urge to jump in. Those moments of confusion are not failures; they’re opportunities to make your product even better.


    Step 3: Reflect with Your Team

    When all user sessions are complete, it’s time to analyze the results. Pattie Belle Hastings puts it best:

    “Analyzing the data from user testing in a Design Sprint is critical for deriving meaningful insights, identifying areas for improvement, and determining steps forward after the Sprint.”

    Pattie Belle Hastings

    During this debrief, your team should identify recurring patterns or problems, highlight areas where users were both confident and confused, review task completion rates and timing, observe users’ body language and facial expressions, and, if possible, collect both quantitative and qualitative feedback.

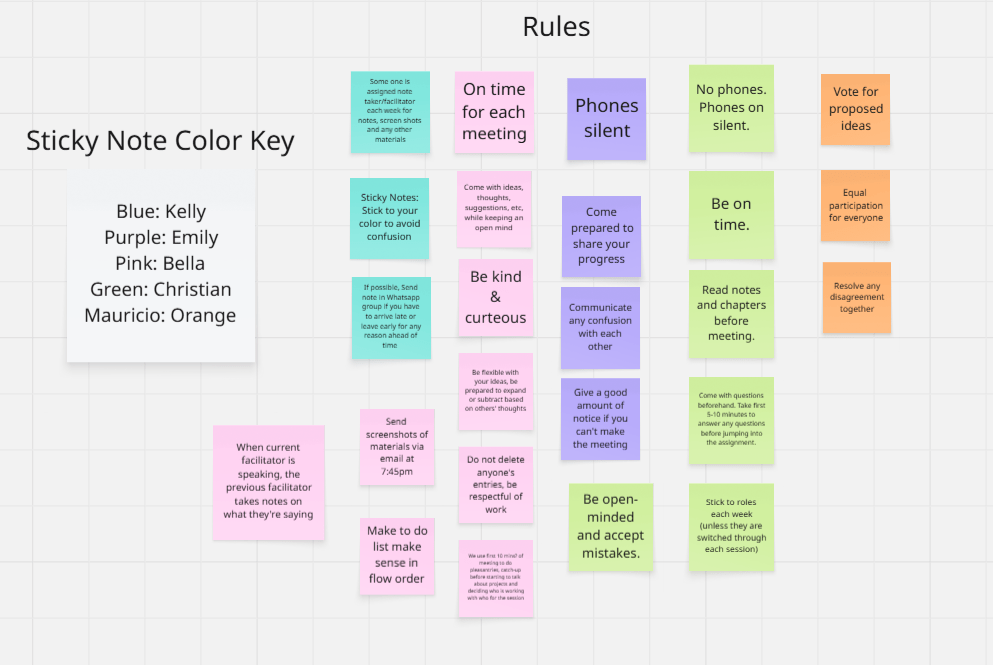
    You can write down observations in a shared document, on sticky notes, or on a digital whiteboard. When the insights are clear, schedule a check-out meeting to decide your next steps. Do you iterate on the prototype? Do you move forward with development? The decision will come from the evidence.

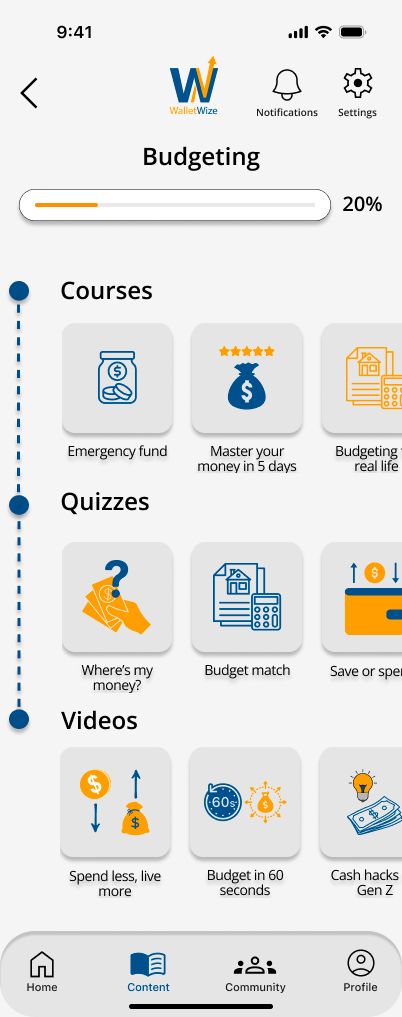
    To view my team’s user testing documentation and results, click here.


    Final Lap: Celebrate and Reflect

    You did it! Your team sprinted through ideation, prototyping, and testing. You gathered real feedback and now have a stronger sense of where your solution stands.

    So take a moment. High-five your team. Celebrate the collaboration and your hard work. Whether you nailed it on the first try or have adjustments to make, you’ve completed something meaningful.

    Cross that finish line strong.

  • The Art of Building Quick Prototypes: Phase 3 of Design Sprints

    The Art of Building Quick Prototypes: Phase 3 of Design Sprints

    You and your team are mid-race, and the stakes are rising. You’ve hit your stride, picked up steam, and now it’s time to execute. Phase 3 of the Design Sprint, Prototype and Refine, is all about collaboration and showcasing your strengths.

    At this stage, the ideas are there. Now, your job is to bring those ideas to life in a way that’s fast, intentional, and “good enough” for user testing. As Jake Knapp, John Zeratsky, and Braden Kowitz write in Sprint: How to Solve Big Problems and Test New Ideas in Just Five Days:

    “You’ve got an idea for a great solution. Instead of taking weeks, months, or, heck, even years building that solution, you’re going to fake it…To prototype your solution, you’ll need a temporary change of philosophy: from perfect to just enough, from long-term quality to temporary simulation.”

    Knapp, Zeratsky, and Kowitz

    That quote stuck with me, especially as someone who tends to chase perfection. The prototype mindset is about learning quickly. The goal is not to create a flawless product; it’s to simulate one realistic enough to gather feedback. So, how do you do that in just one day?

    Let’s break it down.


    Understanding Phase 3 Goals

    Pattie Belle Hastings outlines five key objectives in The Sprint Handbook: A Step-by-Step Guide to Planning and Running Innovation Sprints to guide the Prototype and Refine phase:

    • Rapid Realization: Quickly turn ideas into something tangible.
    • Focus on Critical Elements: Build only what matters most to test.
    • Prepare for User Testing: Design the prototype to gather useful feedback.
    • Resource Efficiency: Use the least amount of time and tools to get the job done.
    • Collaboration: Lean on each team member’s strengths to bring the product to life.

    “The prototype phase is the crucible where your ideas are forged into tangible forms, ready for real-world testing…It’s a creative endeavor that requires a blend of ingenuity, skill, and strategic thinking.”

    Pattie Belle Hastings

    This phase is where your team can shine. Focus on what matters most and continue the Sprint.


    Step 1: Pick the Tools

    Start by selecting your design tools. Depending on your team’s skills and project goals, you might choose:

    • Wireframes: Low-fidelity designs that outline structure
    • Mockups: High-fidelity visuals that simulate a real interface
    • Clickable Prototypes: Interactive designs that mimic real use
    • Functional Prototypes: Working products with built-in features

    Common tools include Figma, Sketch, Adobe XD, InVision, and Canva. For my team’s Gen Z personal finance app, we used Canva for wireframes and Figma for clickable prototypes. These tools matched our team’s skills and needs.


    Step 2: Divide and Conquer

    Time is limited, so efficiency is key. Assign roles based on experience and interest. Encourage each person to advocate for the role that best suits them.

    For our group, roles included:

    • Wireframe Creators: Sketched the app’s layout
    • Writer: Created on-screen text and instructions
    • Asset Collector: Gathered app content and visuals
    • Makers: Built the prototype in Figma
    • Illustrator: Designed custom icons and the app logo
    • Stitcher: Reviewed the prototype for consistency and flow

    I was assigned three roles: wireframing, illustrator, and stitcher. With a design background, I created the app’s logo and visual identity, and I reviewed all aspects of the prototype, including content, spelling, interactivity, and visuals, to ensure the finalized product was polished and ready to go.


    Step 3: Build the Prototype

    The Budgeting Category screen in my group’s app.

    This is the heart of the phase. Using the storyboard from Phase 2, your team starts constructing the prototype. Make sure all team members are designing at the same fidelity level, review the prototype for consistency in design and functionality, ensure interactive elements align with the user flow, revisit Sprint objectives to stay focused, and prepare for user testing. The goal here is clarity, not perfection.

    Knapp, Zeratsky, and Kowitz assert that the prototype should look real enough that users believe it’s a functional product. This step will help the team learn about the areas of the product that work well and elements that require editing.


    Step 4: Conduct a Trial Run

    Before handing your prototype over to testers, test it internally. This gives your team the chance to identify confusing steps or design issues early. It is important to schedule a time for the entire team to conduct a trial run. Assign a group member to play the role of the user, gather feedback, and revise as needed.

    “Trial runs help your team fine-tune the prototype, identify potential issues, and ensure a smooth and effective testing session.”

    Pattie Belle Hastings

    Ask yourself: Does the product feel intuitive? Does the prototype reflect our Sprint goals? This step builds confidence and alignment before entering the final testing phase.


    Team Reflection: What Worked for Us

    This week, our team focused on communication, task alignment, and preparation. We clearly outlined roles, set deadlines, and checked in frequently. Having designated roles based on individual strengths helped us stay accountable and confident in our contributions.

    We also met virtually several times throughout the week, checked in with each other in our text group chat frequently, communicated early and often, and celebrated small wins along the way.

    One of the biggest lessons I learned this week? Don’t wait to speak up. If something is unclear, ask. If something’s off, say something. Holding yourself accountable while staying open to feedback makes a big difference in the pace and quality of your work.

    View my team’s wireframes and prototypes here.


    Final Thoughts: Eyes on the Finish Line

    This phase of the Sprint felt like the middle miles of a race. You’ve already started strong, and now you need to stay focused and finish strong. The prototype phase requires energy, attention to detail, and trust in your team.

    When it’s done right, it’s incredibly rewarding. You’re not just imagining your solution; you’re seeing it come to life.

    At this point, your product is ready to be tested. Keep your head up, keep your pace steady, and get ready for the next phase: testing with real users.

    The finish line is near.

  • Building the Blueprint: Deciding and Storyboarding with Your Sprint Team

    Building the Blueprint: Deciding and Storyboarding with Your Sprint Team

    You’ve laced up. You’ve found your pace. Now you’re in a full sprint.

    That’s exactly what Phase 2 of the Design Sprint feels like.

    After assembling your team and navigating the initial steps, this is the part of the Sprint where you have to stay focused, communicate clearly, and trust your teammates. Just like in a relay, everyone’s contribution counts, and collaboration makes all the difference.

    Have you ever heard of the African proverb, “If you want to go fast, go alone; if you want to go far, go together”? This quote applies directly to the Sprint. If your team is aligned and unified, you will achieve great solutions together.

    Phase 2 of the Design Sprint, Decide and Storyboard, is all about making critical choices and beginning to shape your final solution. You evaluate the ideas generated in Phase 1 and decide which ones are worth turning into a prototype. In Sprint: How to Solve Big Problems and Test New Ideas in Just Five Days, Jake Knapp, John Zeratsky, and Braden Kowitz describe the steps of this phase:

    “You’ll critique each solution, and decide which ones have the best chance of achieving your long-term goal…you’ll take the winning scenes from your sketches and weave them into a storyboard: a step-by-step plan for your prototype.

    Jake Knapp, John Zeratsky, and Braden Kowitz

    Let’s break it down.


    Step One: Decide

    Everyone has strong ideas, and that could make the idea voting process tricky. Luckily, Pattie Belle Hastings, in The Sprint Handbook: A Step-by-Step Guide to Planning and Running Innovation Sprints, offers a clear, structured path to voting on solutions:

    The Art Museum

    Think of your sketches like artwork on display. Pin your 4-Step Sketches from Phase 1 and observe them silently, just like how you would walk through an art gallery. This will give your team members time to analyze each idea individually before jumping into discussion.

    Heat Map Voting

    Distribute a sheet of red dots to your team members so they can mark parts of the sketches they found promising and interesting. Hastings suggests voting based on:

    • Feasibility
    • Desirability
    • Impact
    • Alignment with project goals

    After voting, it is important to discuss the ideas that received the most votes. Ensure each team member has a chance to speak and share their thoughts.

    Speed Critique

    With a timer set for each idea, have your Facilitator walk the team through each concept and capture key takeaways on three or four sticky notes per idea. This step will allow your group to highlight the strengths and potential concerns of each sketch without going off-track.

    Straw Poll Vote

    Each teammate should then select their favorite concept and write down the reason why they chose that idea. This will help visualize the group’s preferences and concept popularity.

    The Supervote

    The final decision is in the hands of your team’s Decider. This exercise should be given a defined time frame, and the Decider will vote using two dots. The votes can be distributed in a few ways:

    • Both dots on one concept.
    • One dot on a concept, and another dot on a specific feature from another concept.
    • Both dots on two different concepts.

    Step Two: Storyboard

    When the concepts are selected in the Decide stage, it’s time to visualize how your future prototype would function step by step.

    Hastings, Knapp, Zeratsky, and Kowitz suggest to start with User Flows, a six-step process outlining user actions like taps or clicks. Each team member should create their own user flow by defining the first and finals actions and then filling in the middle steps. The group then votes on the flow that they want to move forward with.

    From there, your team will convert the winning user flow to an 8-screen storyboard, crafting a visual guide to illustrate the user’s journey.

    “Storyboarding is a simple process, with a ton of tiny decisions along the way…Every decision you make now is something you won’t have to think about when you build your prototypes.”

    Jake Knapp, John Zeratsky, and Braden Kowitz

    Along with the visuals, write simple, clear captions beneath each screen describing how the user will interact with your product. This will help your group stay aligned and will be beneficial in the next phase of the Design Sprint.


    Team Reflection: Our Decide and Storyboard Experience

    This week, my team met over Zoom to work through the Decide and Storyboard phase for our Gen Z personal finance app. We came prepared. Everyone completed their user test flows and reviewed each other’s sketches beforehand. This prep made a huge difference and allowed us to use our time together efficiently.

    In the meeting, we:

    • Used the Heat Mapping, Straw Poll Vote, and Supervote exercises to identify our top features.
    • Set timers to keep our discussion focused.
    • Made time for critique, clarification, and team input.
    • Spent time refining our storyboard collaboratively.

    To view my team’s work from this week, click here.


    Final Thoughts

    Pattie Belle Hastings sums up the importance of this phase in the Design Sprint: “This is a pivotal moment in the Sprint that transitions the team from decision-making to prototyping. It’s important to end this day with clarity and focus.”

    The Decide and Storyboard Phase is where your team’s ideas begin to take shape. It’s where rough sketches transform into plans, and where individual creativity blends into shared vision. In terms of our race analogy, this is the mile marker where momentum builds, and the finish line starts to feel real.

    Here are a few takeaways from this phase:

    • Communicate early and often. When ideas aren’t clear, ask questions.
    • Be flexible. If a vote doesn’t go your way, stay open and engaged.
    • Give ideas time to breathe. Sketching, reviewing, and refining takes time, and that’s okay.

    We’re not just running anymore; we’re sprinting with purpose.

    Stay tuned for Phase 3, where we’ll bring our ideas to life in the Prototype stage.

  • Map and Sketch: The Starting Line of Innovation

    Map and Sketch: The Starting Line of Innovation

    The past few weeks, you’ve done the preparation. You’re at the starting line of the race. Your teammates are beside you. No doubts. No fear.

    You hear a loud, resounding “Go!” Your team takes off. The Design Sprint has officially begun.

    Just like the start of a real race, the kickoff of a Design Sprint is full of momentum and possibility. You’ve spent time organizing roles, reviewing expectations, and understanding the problem you want to solve. Now, you begin the Map and Sketch phase. This is where you find your rhythm and start illustrating solutions.


    What is the Map and Sketch Phase?

    According to The Sprint Handbook: A Step-by-Step Guide to Planning and Running Innovation Sprints by Pattie Belle Hastings and Sprint: How to Solve Big Problems and Test New Ideas in Just Five Days by Jake Knapp, John Zeratsky, and Braden Kowitz, the first phase of a Design Sprint is about understanding your problem, defining goals, and developing ideas visually.

    “In the Map and Sketch phase, you’ll learn how to dissect the problem space, gather insights, and set clear objectives for the work ahead.”

    Pattie Belle Hastings

    This phase is split into two days. Let’s explore what exercises you should conduct each day to start your Design Sprint in the best way possible.


    Day 1: Create the Path

    Your team begins by conducting short expert interviews with people who are experts with your proposed product. Getting insights from them will provide helpful background information and research for your project.

    Example questions to ask experts include:

    • What problem are we trying to solve?
    • Who is currently using the product?
    • What could this product look like in one to two years?

    Next, identify your “How might we…?” questions. HMW’s help turn challenges into opportunities. Hastings recommends keeping these statements focused and specific for future brainstorming. An example of a “How might we…?” question could be:

    How might we design an app that teaches Gen Z about personal finance management in an engaging and fun way?

    Group your HMWs by theme, discuss them, and vote on the most important ones. This democratic method ensures that each voice is heard before narrowing your team’s focus.

    Next, define your long-term goal. This helps align the group and set a clear vision for the product. Using sticky notes, each member writes their goals and presents them to the group. After discussion and voting, if a tie occurs, the Decider, your team’s final decision-maker, steps in to choose the final goals.

    Sprint Questions are up next. These are potential roadblocks that your team could face when achieving the long-term goal(s). These questions are usually phrased as “Can we…?” statements:

    Can we guide Gen Z users through their first financial task within five minutes?

    Once shared and voted on, keep your top three Sprint Questions visible on a physical whiteboard or collaborative platform like Miro.

    To wrap up Day 1, your team should create a product journey map. Knapp, Zeratsky, and Kowitz provide a few tips on creating an effective map:

    • List the users, the people that will engage with your product, on the left.
    • Write the end goal on the right.
    • Use words and arrows between to illustrate the user flow.
    • Keep it simple with less than twenty steps.
    • Communicate with your team to make sure the map makes sense.

    This map doesn’t need to be a work of art. It should depict the user’s journey and the steps between the starting point and the solution.


    Day 2: The Solution Day

    Now that the path is clear, it’s time to generate ideas.

    Start with lightning demos. These are short presentations where team members share inspiration from existing products or solutions. Hastings suggests allowing 25 minutes for this step. Each team member shares three examples from current products that could influence or improve your project.

    The next step? The Four-Step Sketch, which emphasizes quality thinking over artistic ability.

    “On Monday, you and your team defined the challenge and chose a target. On Tuesday, you’ll come up with solutions… remix and improve… and sketch, following a four-step process that emphasizes critical thinking over artistry.”

    Knapp, Zeratsky, Kowitz

    Here’s the breakdown:

    1. Notes: Review and write down key takeaways from Day 1, such as the “How Might We…?” Questions, Sprint Questions, Long-Term Goal(s), and any other important information. Allow 20 minutes for this step.
    2. Ideas: Turn your notes into rough visual concepts. Dedicate another 20 minutes for the Ideas phase.
    3. Crazy 8’s: Fold a paper into eight boxes. Take one idea and sketch eight variations in eight minutes.
    4. Solution Sketch: Pick your strongest idea and draw more detailed versions.

    When the Solution Sketches are complete, hold onto them and share them with your team the following day.


    My Team’s Experience: Virtual and Collaborative

    My team is conducting our Design Sprint virtually. For “Day 1” of this phase, we met on Zoom and worked together to identify the problem, create HMWs, define long-term goals and Sprint Questions, and draw our product map. We used a shared Miro board and sticky notes to collaborate in real time.

    For “Day 2,” we split up to complete the lightning demos and sketches on our own, following the “together alone” approach. We regrouped by uploading our work to the Miro board and providing feedback. Even though we worked separately, we stayed in sync and communicated with each other.

    To view my group’s Design Sprint progress, click here.


    Final Thoughts: It’s Only the Beginning

    What are some key takeaways from Phase 1 of the Design Sprint? Identify your direction before creating solutions, vote on everything to ensure everyone’s voice is heard, ask questions, communicate, and enjoy the Sprint.

    We’ve only just begun, but the foundation we laid in the Map and Sketch phase sets us up for a strong sprint ahead. Just like a race, the energy you bring at the start can carry you far, only if you pace yourself, listen to your team, and stay open to change.

    The Sprint has begun. We’re off running.

    Stay tuned for the next phase of my Design Sprint journey.

  • Setting the Pace: How to Gear Up for a Successful Design Sprint

    Setting the Pace: How to Gear Up for a Successful Design Sprint

    In my last post, I explored how using tools like Miro and intentional introductions can help build camaraderie before your Design Sprint begins. Think of that phase as stretching before a relay race. You’ve sized up the course, you’ve met your teammates, and you’re lacing up your shoes. Now, you might be wondering: what comes next?

    Much like running an actual race, you wouldn’t step up to the starting line without knowing the course, having the right gear, and understanding who’s handing off to who. In a Design Sprint, preparation is your pre-race routine. It’s not just a warm-up; it’s what prepares your team for innovation at full speed.

    Let’s take a deeper dive into what proper preparation looks like and why it’s a game changer.


    Why Preparation Matters: The Competitive Edge

    In The Sprint Handbook: A Step-by-Step Guide to Running Innovative Sprints, Pattie Belle Hastings outlines the many benefits of preparing for a Design Sprint:

    • Efficiency & Effectiveness: A prepared team accomplishes more in less time, produces higher-quality work, and minimizes delays. Preparation leads to better output because everyone comes ready to contribute.
    • Team Dynamics: Clarity with roles and goals boosts morale. When everyone understands the playbook, collaboration flows naturally.
    • Stakeholder Relations: Early engagement builds trust and ensures stakeholders feel heard. Their input is built into the process, not added as an afterthought.
    • Risk Mitigation: Preparation allows for early problem identification and helps set predefined metrics, so you’re solving the right problems more effectively.
    • Long-Term Value: Well-prepared sprints become easier to replicate, scale, and refine. Your team develops a rhythm and learns from each iteration.

    The takeaway? Preparation isn’t just about making things run smoothly; it’s about unlocking the full potential of your team and your process.


    Building Your Dream Team

    Jake Knapp, John Zeratsky, and Braden Kowitz, authors of Sprint: How to Solve Big Problems and Test New Ideas in Just Five Days, describe the role of a Sprint team:

    “A sprint resembles that perfectly orchestrated heist. You and your team put your talents, time, and energy to their best use, taking on an overwhelming challenge and using your wits to overcome every obstacle that crosses your path.”

    To pull off this “heist,” you need the right crew. A sprint team should be small but mighty with seven members or fewer. Each person should bring a unique skillset and perspective. Here are some key roles to fill:

    • Decider: The final call-maker. Often a CEO, product manager, or team lead.
    • Finance Expert: Knows the budget and where resources come from.
    • Marketing Expert: Shapes messaging and brand voice.
    • Customer Expert: Brings the user’s voice to the table.
    • Tech Expert: Understands feasibility and builds logistics.
    • Design Expert: Brings ideas to life through visuals.

    Most importantly, ensure everyone knows their role. A well-rounded, cross-functional team makes for a powerful and efficient sprint.


    Creating Structure: Rules, Schedules, and Space

    Once your team is set, establish a few ground rules. One suggestion? A “No Devices” policy. Encouraging participants to silence phones and limit distractions can help keep focus sharp. If everyone agrees on expectations, it’s easier to stay on track.

    Next, block off time. Design Sprints require energy, and fragmented schedules create barriers for momentum. As the authors of Sprint emphasize:

    “Sprints require energy and focus, but the team won’t be able to give that effort if they’re stressed out or fatigued.” – Knapp, Zeratsky, & Kowitz

    Dedicate six focused hours a day for five consecutive days. This window keeps energy levels high and decision-making tight. A time-boxed format also reduces the chance of getting stuck in the weeds.


    Supplies & Tools: Your Sprint-Day Kit

    Whether you’re sprinting in-person or virtually, having the right tools is crucial. Hastings and Knapp both recommend purchasing whiteboards, which are great for mapping and collaboration. Securing sticky notes and using colors to sort ideas is a fun and effective way to organize ideas. Who doesn’t love color coding? Timers will keep everyone accountable and help team members stay on track, and moveable furniture encourages physical collaboration and flexibility. Also, don’t forget some healthy snacks to help fuel the brain!

    Conducting a virtual Sprint? Platforms like Miro and Google Docs allow participants to edit documents simultaneously, helping the team visualize their work and make decisions in real time. Using quick capture video tools like Loom or Descript will create more visual aids and supercharge productivity.

    These tools might seem small, but they support a smooth, distraction-free environment where your team can focus on creating solutions.


    Final Prep Steps: Checklists and Communication

    Want to know one of the best tips from Hastings? Create a checklist to confirm the essentials:

    • Who is the Decider and will make the final decisions?
    • What’s the topic or challenge?
    • Where and when will the Sprint happen?
    • Who’s participating?

    Also, don’t overlook the power of communication. As Hastings writes:

    “Effective pre-Sprint communication sets the stage for successful outcomes. Your team will appreciate clear, engaging, and informative communication before the Sprint begins…you’ll build a well-organized, focused, and engaged team that’s ready to tackle the challenges ahead.”

    Set up a shared, collaborative document with background research, the schedule, and access to all necessary tools. Before the Sprint, hold a debrief meeting to go over expectations, answer questions, and align the team.


    What This Looked Like For Me

    My group’s shared Miro board outlining our Design Sprint rules.

    This week, my team and I had our first virtual meeting in preparation for our Design Sprint challenge. We’re new to this process, so there were a few hiccups, but that’s okay.

    We shared backgrounds and skillsets, identified our roles, and created a shared Google Doc and Miro board. These spaces helped us capture ideas, questions, and progress. Most importantly, we fostered an open environment where everyone felt heard. We experimented with templates, asked questions, and embraced the learning process.

    Perfect? No. Productive? Absolutely. And that’s the point! Don’t get discouraged if your first session isn’t “perfect.” Buckle up, embrace the imperfect, and enjoy the ride.


    Final Thoughts

    Here’s your final reminder: Prep. Prep. And more prep. Design Sprints move quickly. If you invest time upfront and choose the right people, set clear expectations, and gather tools, you’ll create an environment for a smooth, creative, and productive experience.

    Your Design Sprint is about to begin. Are you ready?

    Stick around as I continue documenting this journey. Next up, we take off sprinting!