Tag: Content Creation

  • From Idea to Execution: My Content Creation Process

    From Idea to Execution: My Content Creation Process

    I’ve always been someone who sees the story first. Growing up, I loved “painting the picture” for friends and family and bringing ideas to life through words, visuals, and creativity. I was especially drawn to commercials, films, and design: the kind of content that makes you stop, watch, and feel something.

    That early interest grew into a passion for content creation and brand storytelling. Over the past five years, I’ve refined a process that helps me turn ideas into content that is both intentional and impactful.

    If you’re a content creator, marketer, or designer, this is for you.


    What Is Content Creation?

    Before diving into the process, it’s important to define what content creation actually is.

    “Content creation is the process of developing and sharing media in various formats to reach and engage your target audience.”

    Alex Lindley

    At its core, content creation is about connection. It’s not just about making something look good; it’s about creating something people feel.


    My 4-Phase Content Creation Process

    Four-Stage Content Creation Process

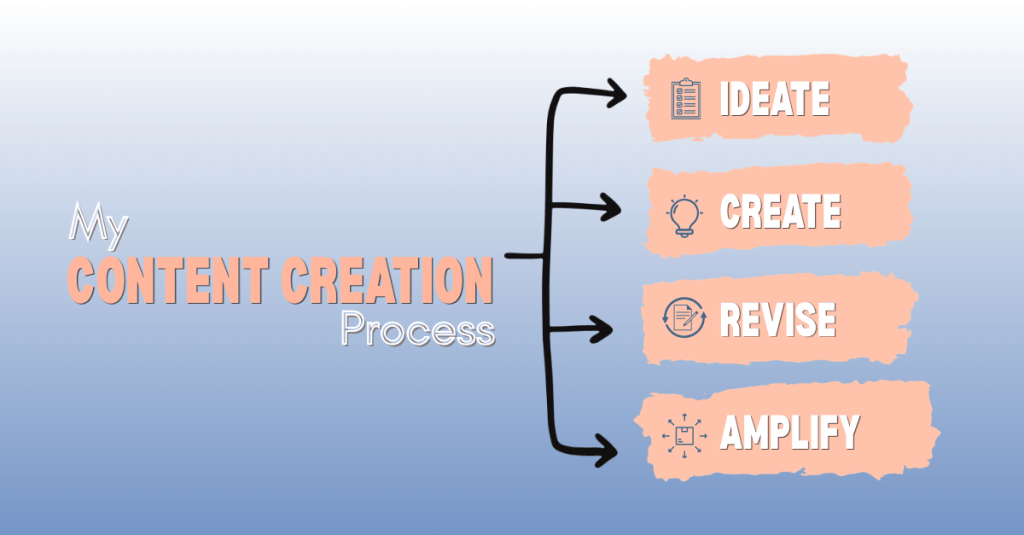
    I follow a simple four-phase process inspired by Angela Tague’s framework: Ideate, Create, Revise, and Amplify. Each phase builds on the last to ensure the final content is both strategic and engaging.

    Phase 1: Ideate

    Every piece of content starts with an idea, but strong ideas don’t happen by accident. This phase is all about aligning creativity with strategy. Before I design anything, I take time to understand the audience, explore trends, and organize my thoughts. I create mind maps to generate ideas and tools like Trello to keep everything structured. This step sets the foundation for everything that follows.

    Questions to ask:

    • Who is this content for?
    • What problem does it solve?
    • Does this align with my brand or message?
    • Would I engage with this if I saw it online?

    Phase 2: Create

    When the idea is clear, it’s time to bring it to life. This is where strategy turns into visuals, copy, and content that people can actually see and interact with. While this phase is more hands-on, I always stay grounded in the original goal to make sure the content stays focused and effective.

    Questions to ask:

    • Does this still align with the core idea or goal?
    • Has the idea evolved in a way that improves the final outcome?
    • Is the message clear and easy to understand?
    • Would I stop and engage with this if I saw it online?

    Phase 3: Revise

    Content rarely comes out perfect on the first try. The revision phase is where I step back and refine the work to make it stronger. This includes editing for clarity, improving design elements, and getting feedback from others. Even small changes can make a big difference in how the content is understood and received.

    Questions to ask:

    • Is the message as clear as possible?
    • What can be simplified or improved?
    • Would someone outside of my field understand this?

    Phase 4: Amplify

    Creating great content is only half the job. Making sure it reaches the right audience is just as important. In this phase, I focus on distribution and performance. This includes optimizing for SEO, posting across platforms, and thinking about how the content can be repurposed. The goal is to extend the life of each piece of content and maximize its impact.

    Questions to ask:

    • Where will this content perform best?
    • How can I repurpose this for other platforms?
    • Is it easy for my audience to find and engage with?

    Why This Process Matters

    Having a clear content creation process makes everything more consistent and effective. It helps streamline production, keeps messaging aligned, and ensures that each piece of content has a purpose.

    “Every piece of content should help build your brand so that you become the first person people think of when they have a need you can fill.”

    Jon Loomer, The Secret to Consistent Content Creation

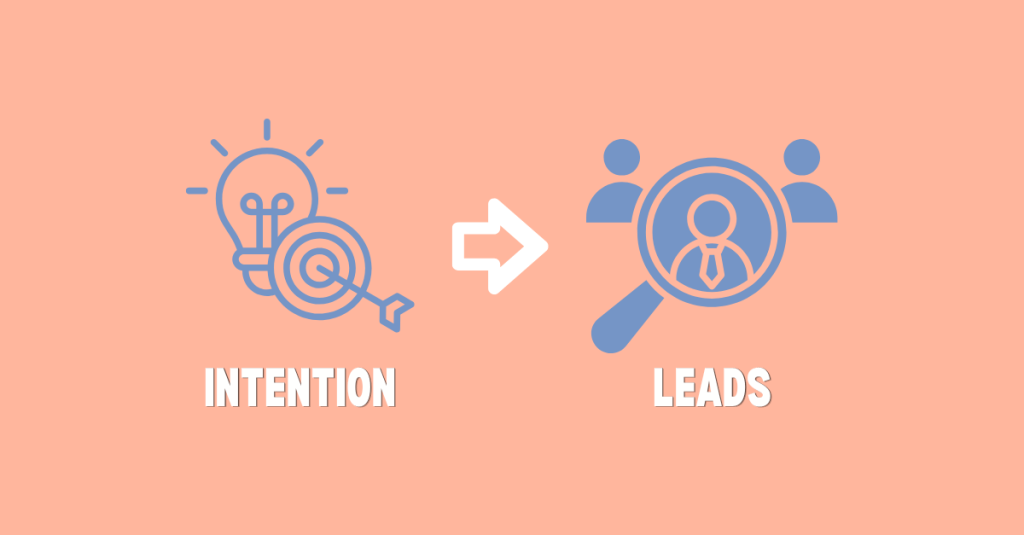
    This idea has stuck with me. Content is not random; it’s intentional.


    Tools That Support My Process

    The right tools can make a measurable difference, but more importantly, it’s about how you use them. These are a few tools I use to bring ideas to life:

    Each of these tools plays a role at a different stage of my process: from brainstorming ideas to executing and refining content.

    If you’re looking to explore more options, 22 Best Content Creation Tools for Creators by Cecilia Meis is a great resource to get started.


    Create with Purpose

    Content creation is more than just making posts; it’s about telling a story with purpose. From idea to execution, every step plays a role in building something meaningful.

    When you approach content with both strategy and creativity, you don’t just create: you connect.

    Ready to put this process into action? Download my content creation checklist and use it the next time you create.

    Happy creating!

  • From Plan to Pixels: Creating Your First Passion Project Deliverables

    From Plan to Pixels: Creating Your First Passion Project Deliverables

    You’ve done the research, built your project management board, and collected your sources. Maybe you used Trello, Asana, or Monday.com to organize every little task. Now you’re staring at your screen thinking, “Okay, now what?” It’s time to roll up your sleeves and start bringing your ideas to life.

    Getting Started: Trust the Plan You Already Made

    Starting your deliverables can feel overwhelming, but here’s the good news: you’ve already laid the groundwork. If you created a detailed project management plan, you’ve already mapped out what you need to do. That’s exactly what helped me when I began creating my infographics this week. I returned to my Trello board, looked at the tasks under “Week 3,” and followed them step by step: conduct research, outline content, and design the drafts.

    Still unsure what to do next? Go back to your board. It’s like a creative GPS for your project.

    Let the Process Evolve

    Here’s a little secret: the plan doesn’t need to stay perfect.

    As I moved through my Week 3 checklist, I realized I needed an extra step. Creating wireframes wasn’t originally in my plan, but when I added it, everything clicked into place. These quick sketches helped me visualize the structure of my infographics before I even opened up my design software. So, if you find yourself needing to shift things around, go for it. That’s not a failure; that’s part of the process.

    Your project tasks should work for you, not the other way around.

    Designing Impactful Infographics: Tips from the Experts

    If your project involves creating infographics, you have come to the right place! I began this process by reviewing two fantastic resources that gave me a solid framework and design confidence. In Educator’s Blueprint: A How-To Guide for Creating a High-Quality Infographic, Gottlieb, Ibrahim, Martin, Yilmaz, and Chen break down creating an infographic into six helpful steps:

    • Know your audience
    • Curate relevant content
    • Create a clear structure
    • Use strong visual design
    • Choose your tools wisely
    • Ask for and apply feedback

    These tips helped me when creating my infographics this week. In Creating Effective Infographics: Visualizing Data for Impact, Eddy emphasizes balancing text with visuals and making sure data shines without overwhelming the viewer. That advice really stuck with me. I made sure to write my content first, then build visuals that supported and enhanced the message, not the other way around.

    When designing your own infographics, don’t forget about:

    • Consistent branding
    • Thoughtful color choices based on color theory
    • Clear typography with limited, legible fonts

    These small choices make a big difference.

    A Peek Behind the Curtain: My Process

    To see my outline, wireframes, and final infographic drafts, click here.

    The transition from sketches to polished designs took time, but having a structure in place helped me stay focused. The wireframes acted like a blueprint that made design choices easier.

    Stay on Track with a Production Journal

    Want to keep tabs on your weekly progress? Start a production journal.
    I learned this tip from Pattie Belle Hastings, who recommends documenting:

    • The tasks you completed
    • How long it took
    • The current status (in progress or done)
    • The tools or software you used

    It doesn’t have to be fancy. Just keep it consistent. By the end of your project, you’ll have a clear picture of how your work unfolded and a record you can reference later or include in your portfolio. Here is my production journal:

    One Last Thing: Embrace the Process

    The most important thing I’ve learned while creating deliverables?
    Enjoy the ride.

    Creative projects are never perfectly linear. Plans change. Ideas evolve. You’ll make mistakes, try new things, and discover better ways to communicate your message. Let yourself experiment, and have fun with the process.

    You’re building something you’re passionate about, so let that excitement show in every step you take.

  • Peaks and Projects: Turning a Passion for National Parks into a Content Creation Campaign

    Peaks and Projects: Turning a Passion for National Parks into a Content Creation Campaign

    How do you turn something you love into something you create? That was the question I had to answer recently when I started my Content Creation course at Quinnipiac University. For our class, we were given a big task: pick any subject, any medium, and use it as the foundation for a 7-week content project.

    No constraints. No templates. Just a blank page and total creative freedom.

    At first, that sounded exciting. But it also felt a little overwhelming. Where do you even start?


    Brainstorming a Passion Project

    When you’re told you can create anything, it can be hard to narrow it down, especially when you’re someone with a lot of interests. My best advice for brainstorming a passion project? Write everything down. Seriously. Don’t filter. Don’t overthink. Just make a big list of topics you’re passionate about, hobbies you love, causes that matter to you, and stories you want to tell.

    For me, that list included National Parks and Preservation, two things I deeply care about. I’ve had the chance to visit Rocky Mountain National Park over the past few years, and I knew I wanted to tell a story about it. The breathtaking views, the wildlife, and the feeling of traveling on Trail Ridge Road is something I will never forget. I wanted to bring my travel experience and my passion for preservation to the classroom.


    Researching Your Topic

    When I settled on Rocky Mountain National Park as my subject, the next step was research. This step is all about building a strong foundation for a multimedia campaign.

    I gathered information from trusted, multimedia sources such as:

    • The National Park Service’s official site
    • Documentaries like The Living Dream: 100 Years of Rocky Mountain National Park
    • Visitor blogs and trip reports
    • Podcasts from The Rocky Mountain Channel
    • Peer-reviewed climate research from the U.S. Forest Service
    • Interactive trail guides and conservation articles

    I wanted to understand the park from all angles: its history, climate challenges, visitor impact, and preservation efforts. These resources became the backbone of my proposed project.


    Introducing: Preserve the Peaks

    So, what is Preserve the Peaks? It’s a multimedia campaign designed to educate and inspire visitors to Rocky Mountain National Park to explore more thoughtfully and respectfully.

    • A series of infographics inspired by vintage national park posters
    • A set of interactive digital posters where users can click or scroll to reveal conservation facts and tips
    • A downloadable digital guide with practical advice, beautiful visuals, and essential park information

    These designs will be guided by one simple goal: to help visitors protect what makes the park so special: its peaks, wildlife, trails, and stories.

    You can check out my full project proposal here.


    Setting Campaign Goals and Schedule

    When planning this campaign, I outlined a few specific goals:

    • Educate travelers on how to safely and respectfully enjoy the park
    • Raise awareness about climate change’s impact on the park’s fragile ecosystems
    • Promote Leave No Trace practices among newer or infrequent visitors

    The campaign is designed for park visitors, especially first-time parkgoers, families planning trips, and younger travelers who are exploring national parks for the first time.

    Over the next seven weeks, I’ll be researching, designing, and refining content for this campaign. Weeks 1 and 2 are all about research. Weeks 3 and 4 are dedicated to creating infographics and interactive posters. Weeks 5 and 6 will focus on building out the downloadable guide. Week 7 will bring it all together.


    Final Thoughts and Advice

    If you ever find yourself faced with a wide-open creative project, here’s what I’ve learned so far:

    • Start by listing what you care about
    • Find the intersection between what excites you and what others might benefit from
    • Stay grounded in good research
    • And most importantly, create something you’d want to use yourself

    I’m excited to dive into Preserve the Peaks and share updates as the project unfolds. Whether you’re a fellow content creator, a park lover, or just someone who’s curious, thanks for following along.

    Stay tuned for more updates, and if you’re planning a trip to the Rockies, check out the official National Park Service site to start your adventure.

    Let’s protect the peaks, together.