Category: Content Creation

  • From Vision to Design: How to Create a PDF Your Audience Will Resonate With

    From Vision to Design: How to Create a PDF Your Audience Will Resonate With

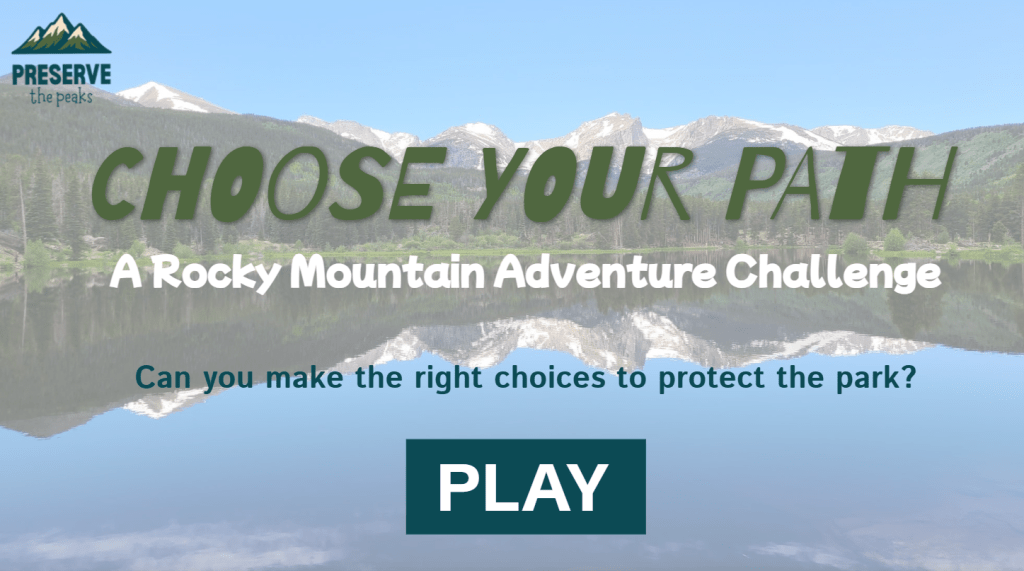
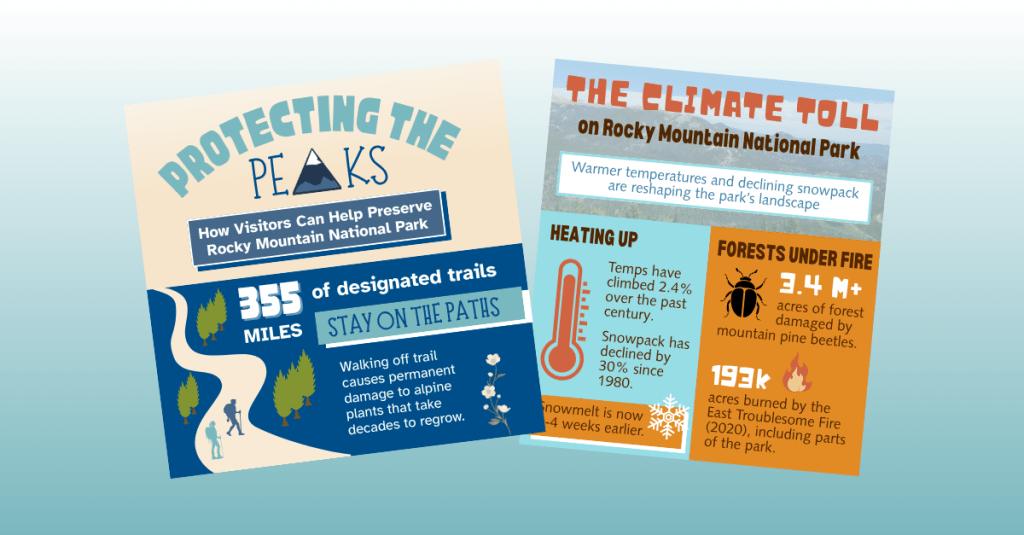
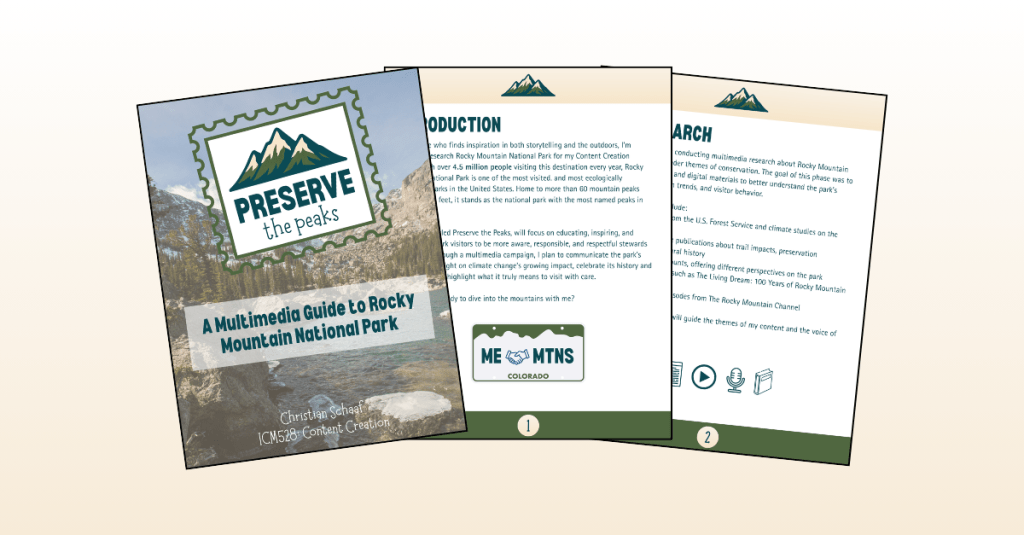
    You’re deep into your passion project. The research is done, your ideas are flowing, and the deliverables are taking shape. For my project, Preserve the Peaks, a multimedia campaign about protecting Rocky Mountain National Park and encouraging responsible park visits, I’ve already created infographics, an interactive game, and a clickable poster in Genially.

    Now it’s time for my next challenge: building a digital PDF guide that’s both informative and fun to read. The goal? A go-to resource for anyone planning a trip to Rocky Mountain National Park, packed with relatable, easy-to-digest content that inspires visitors to both enjoy and preserve the park.

    If you’re ready to create a digital guide that truly connects with its audience, let’s talk best practices.


    Start With Planning (and Then Plan Some More)

    Here’s the first truth I learned: jumping straight into design without a plan is a one-way ticket to a messy, ineffective PDF.

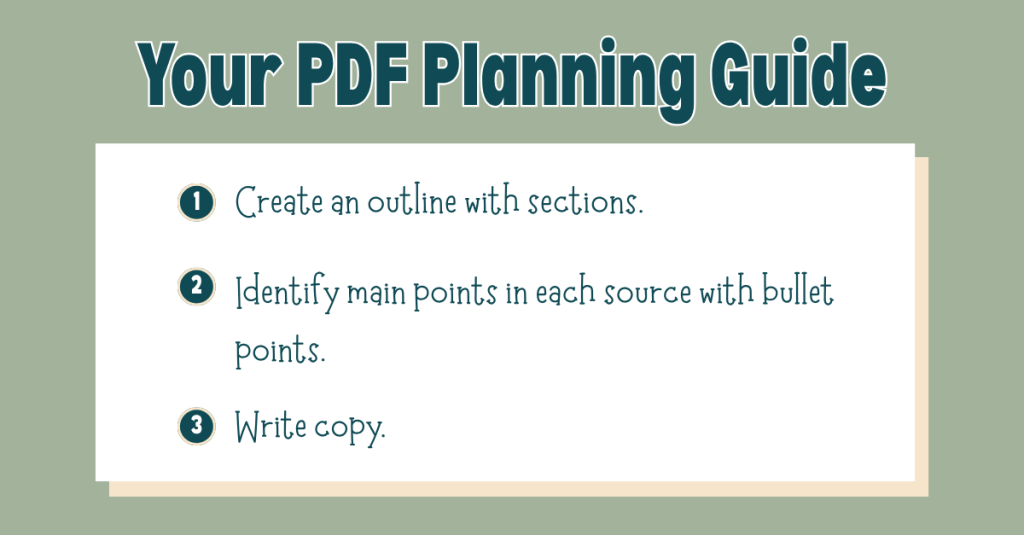
    Before I touched a single design element, I built a detailed outline of the sections I wanted to include. I based this outline on my research and my audience’s needs, and then I went through each source in my bibliography, pulling out 5–10 key facts, stats, or tips that could shape the guide’s copy.

    This prep work meant that when it came time to write, I wasn’t staring at a blank page; I already had a roadmap.

    My biggest takeaway: Give yourself more time for planning than you think you’ll need. That up-front investment will make the writing and design process smoother, faster, and far less stressful.

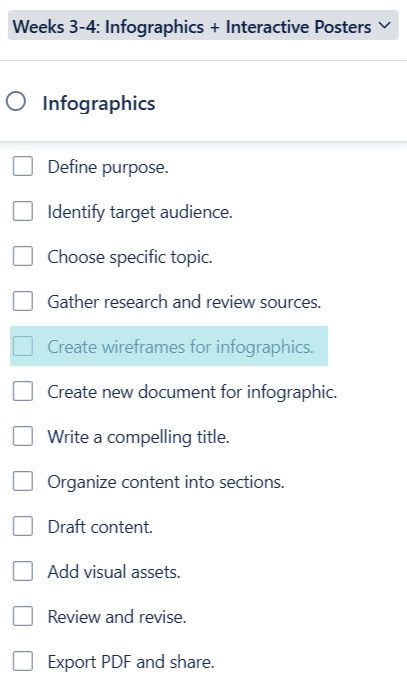
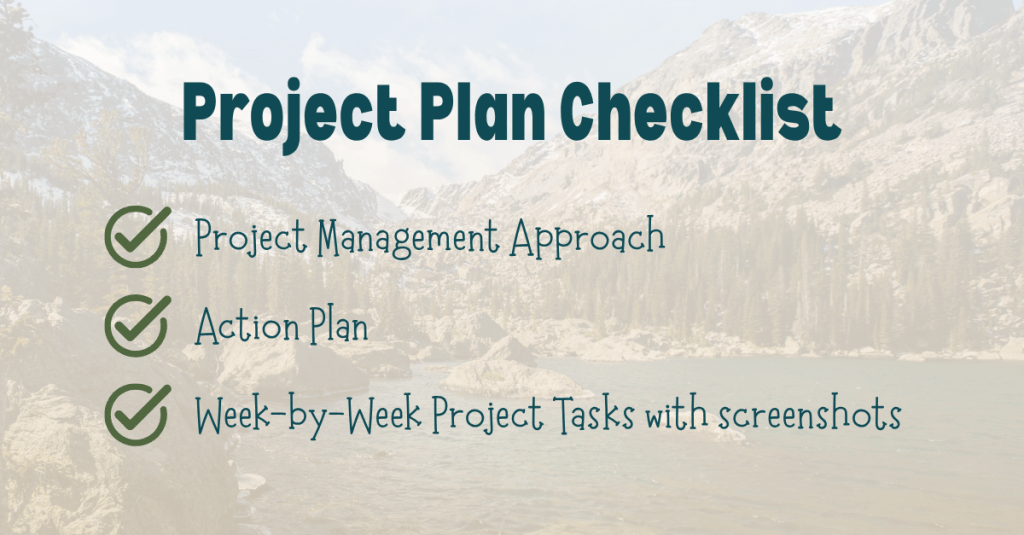
    Want to see my own outline and research notes? Click here to view them.


    Content First, Design Second

    When you’re making something visually appealing, it’s tempting to start with design. But for a PDF guide to be effective, content is the foundation. The design should exist to enhance that content, not overshadow it.

    In Best Practices for Accessible PDF Design, Albee highlights the importance of accessibility from the start. That means:

    • Logical reading order
    • Descriptive alt text for all images
    • Strong color contrast
    • Easy-to-read fonts

    These features aren’t extras; they make sure your content can be enjoyed by everyone. If you wait until the end to think about accessibility, you’ll risk having to redo major portions of your guide.


    Make It Findable, Followable, and Scannable

    In Findable, Followable, & Scannable: 3 Principles for Creating Clear Digital Guides, Jonathan DeVore breaks down how to create an effective PDF guide:

    • Findable: Use search-friendly keywords, clear file names, and logical organization so your guide can be easily located online or on a device.
    • Followable: Keep instructions clear and in the right order so your readers can easily follow along without getting lost.
    • Scannable: Use headings, bullet points, and concise language so readers can quickly grasp the key points, even if they’re just skimming.

    As I build my PDF guide, I will make sure each section is clearly labeled and packed with short paragraphs, bold subheadings, and sidebars for fun facts. That way, whether someone wants to read every word or just grab a quick tip, they’ll get value.


    Always Keep Your Audience in Mind

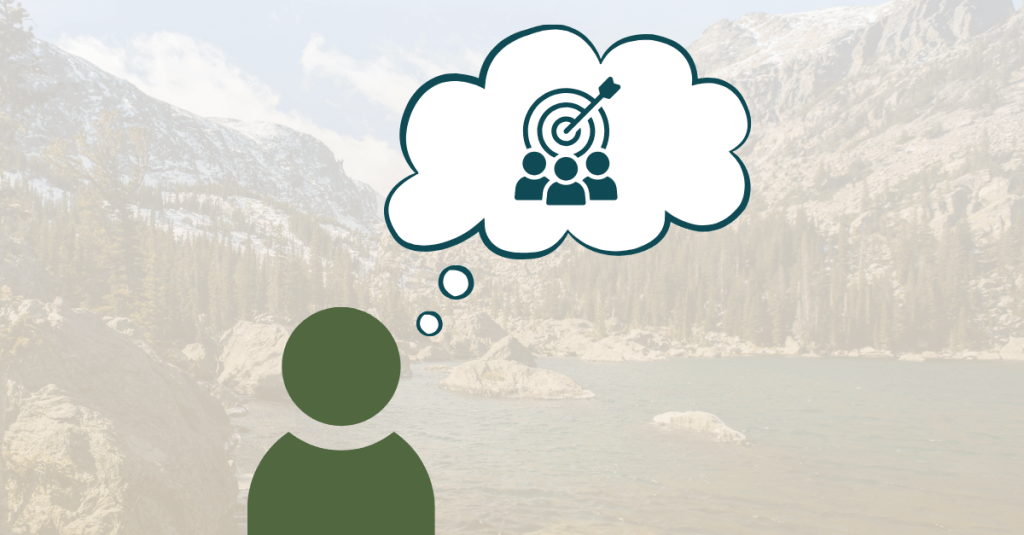
    This is the heartbeat of any good project: your audience is everything.

    Ask yourself:

    • What do they need to know?
    • How do they prefer to read and absorb information?
    • What tone will resonate with them?

    For Preserve the Peaks, my audience is a mix of first-time visitors and returning nature lovers who care about the environment. That means keeping the tone conversational, using accessible language, and sprinkling in excitement about the park’s beauty with practical tips for responsible travel.

    To view my progress on my digital PDF guide, click here.


    Final Thoughts: Planning Wins Every Time

    If you take away one thing from my experience, let it be this: plan first, design second.

    A well-planned guide flows naturally, communicates clearly, and invites readers to explore every section. Combine that planning with thoughtful accessibility and design choices, and you’ll have a PDF that’s not only visually appealing but also memorable and easy to use.

    Whether your goal is to inspire travel, teach a skill, or share important information, your guide has the power to connect deeply with your audience.

    So grab your notes, outline your ideas, and build something worth reading. Your audience is waiting.

    Happy creating!

  • Click, Explore, Learn: Creating Interactive Magic with Genially

    Click, Explore, Learn: Creating Interactive Magic with Genially

    There’s something exciting about being deep into a passion project when ideas start to click and your creativity shifts into high gear. If you’re like me, you reach a point where you’re ready to bring your vision to life through actual deliverables. That’s where things get interesting…and sometimes a little intimidating, especially when using a new tool for the first time.

    This week in my content creation project Preserve the Peaks, focused on preservation of Rocky Mountain National Park, I dove into something completely new: Genially, a platform that lets you create interactive digital content. My goal? Build a poster and a game that didn’t just tell a story, but invited people to participate in one.

    Here’s what I learned along the way, what Genially has to offer, and a few tips if you’re ready to try something new in your own project.


    Getting Started with Genially

    Genially is like the digital playground you didn’t know you needed. You can make interactive infographics, posters, presentations, games, quizzes, and more without needing to code or design from scratch.

    Before I jumped in, I took some time to learn the ropes. And I highly recommend you do the same. It’s tempting to dive right into your project, but learning the platform first will save you time and stress later.

    Genially’s tutorials are super helpful. They walk you through how to choose templates, add interactive features, animate your content, and share your finished product. You can start here with Genially’s first steps guide.

    Think of it like hiking. You wouldn’t hit the trail without checking the map first. Take time to learn the features so you can explore without getting lost.


    Tips for Creating with Genially

    After you explored the program, here are a few tips that really helped me when creating projects this week:

    1. Storytelling Is Everything

    Whether you’re designing a poster or a quiz, remember that you’re not just sharing information, you’re telling a story. Use animation, visuals, and an engaging layout to guide your audience through an experience, not just a page.

    2. Keep Your Audience Engaged

    Genially lets you create buttons, clickable elements, pop-ups, and hover effects. These features make static info feel dynamic and personal. Instead of just reading something, your audience is participating in it.

    3. Make It Fun

    Whether it’s a game or an interactive infographic, your audience should enjoy exploring your project. Keep things clear, concise, and surprising. Give them something to click on. Make them wonder what happens next.

    These tips are inspired by Lopez’s suggested best practices in Interactive, animated, and disruptive: How to create digital content with Genially. A great source I referenced in my project was the National Park Service, especially their page on visitor guidelines and planning visits, which helped me stay accurate and impactful.


    How My Project Evolved

    When I first started, I planned to create an interactive poster encouraging responsible behavior in Rocky Mountain National Park. I wanted it to be informative, visual, and straightforward.

    But after exploring Genially’s features, I realized: Why not make it a game? A playful, click-through experience could make the content even more engaging.

    Interactive Game

    So, I created Choose Your Path, a gamified experience where users select an avatar and navigate through real-life scenarios in the park. Should you stay on the trail? Pack out your trash? Approach that elk for a selfie? Each level presents choices and consequences, with interactive pop-ups and animations that reinforce park values in a fun, visual way.

    Interactive Map of the Park

    I also built a clickable map of Rocky Mountain National Park. Users can click on hotspots like Bear Lake, Trail Ridge Road, or Grand Lake to learn more about each area. This allowed me to teach geography, ecology, and travel tips in an interactive format.

    To view my outlines, wireframes, and Genially projects, click here.


    Lessons Learned

    What did I learn after creating projects in Genially for the first time?

    1.) Leave Time to Explore

    Don’t rush through learning the program. Block out time to experiment, test features, and maybe even start over. That exploration leads to better design and fewer headaches.

    2.) Let Your Ideas Change

    Originally I thought I’d stick with one format. But after experimenting with Genially, I realized I could pivot and create something more interactive. That flexibility made my project stronger.

    3.) Design with Your Audience in Mind

    Make sure what you’re designing is easy to understand, fun to use, and visually appealing. Test it. Click through it yourself. Ask someone else to try it. If they enjoy the experience, you’re on the right track.


    Keep Creating!

    Every creative tool has a learning curve. But when you get the hang of it, it can become a powerful way to share your message.

    Genially gave me a way to not just talk about protecting Rocky Mountain National Park, but to show it and let people interact with it. Whether you’re creating a guide, an educational game, or a simple visual story, this platform has the tools to bring your project to life.

    So go ahead. Try something new. Get your hands dirty. Click every button. Break things and build again.

    Because that’s where the real magic happens.

  • From Plan to Pixels: Creating Your First Passion Project Deliverables

    From Plan to Pixels: Creating Your First Passion Project Deliverables

    You’ve done the research, built your project management board, and collected your sources. Maybe you used Trello, Asana, or Monday.com to organize every little task. Now you’re staring at your screen thinking, “Okay, now what?” It’s time to roll up your sleeves and start bringing your ideas to life.

    Getting Started: Trust the Plan You Already Made

    Starting your deliverables can feel overwhelming, but here’s the good news: you’ve already laid the groundwork. If you created a detailed project management plan, you’ve already mapped out what you need to do. That’s exactly what helped me when I began creating my infographics this week. I returned to my Trello board, looked at the tasks under “Week 3,” and followed them step by step: conduct research, outline content, and design the drafts.

    Still unsure what to do next? Go back to your board. It’s like a creative GPS for your project.

    Let the Process Evolve

    Here’s a little secret: the plan doesn’t need to stay perfect.

    As I moved through my Week 3 checklist, I realized I needed an extra step. Creating wireframes wasn’t originally in my plan, but when I added it, everything clicked into place. These quick sketches helped me visualize the structure of my infographics before I even opened up my design software. So, if you find yourself needing to shift things around, go for it. That’s not a failure; that’s part of the process.

    Your project tasks should work for you, not the other way around.

    Designing Impactful Infographics: Tips from the Experts

    If your project involves creating infographics, you have come to the right place! I began this process by reviewing two fantastic resources that gave me a solid framework and design confidence. In Educator’s Blueprint: A How-To Guide for Creating a High-Quality Infographic, Gottlieb, Ibrahim, Martin, Yilmaz, and Chen break down creating an infographic into six helpful steps:

    • Know your audience
    • Curate relevant content
    • Create a clear structure
    • Use strong visual design
    • Choose your tools wisely
    • Ask for and apply feedback

    These tips helped me when creating my infographics this week. In Creating Effective Infographics: Visualizing Data for Impact, Eddy emphasizes balancing text with visuals and making sure data shines without overwhelming the viewer. That advice really stuck with me. I made sure to write my content first, then build visuals that supported and enhanced the message, not the other way around.

    When designing your own infographics, don’t forget about:

    • Consistent branding
    • Thoughtful color choices based on color theory
    • Clear typography with limited, legible fonts

    These small choices make a big difference.

    A Peek Behind the Curtain: My Process

    To see my outline, wireframes, and final infographic drafts, click here.

    The transition from sketches to polished designs took time, but having a structure in place helped me stay focused. The wireframes acted like a blueprint that made design choices easier.

    Stay on Track with a Production Journal

    Want to keep tabs on your weekly progress? Start a production journal.
    I learned this tip from Pattie Belle Hastings, who recommends documenting:

    • The tasks you completed
    • How long it took
    • The current status (in progress or done)
    • The tools or software you used

    It doesn’t have to be fancy. Just keep it consistent. By the end of your project, you’ll have a clear picture of how your work unfolded and a record you can reference later or include in your portfolio. Here is my production journal:

    One Last Thing: Embrace the Process

    The most important thing I’ve learned while creating deliverables?
    Enjoy the ride.

    Creative projects are never perfectly linear. Plans change. Ideas evolve. You’ll make mistakes, try new things, and discover better ways to communicate your message. Let yourself experiment, and have fun with the process.

    You’re building something you’re passionate about, so let that excitement show in every step you take.

  • A 101 Guide to Organizing Your Passion Project

    A 101 Guide to Organizing Your Passion Project

    You’ve got a big idea, the creative juices are flowing, and your passion project is finally taking shape. Now comes the tricky but fun part: getting organized. Whether you’re crafting a social campaign, building a website, or developing a multimedia series, staying organized will make the creative process much smoother.

    Let’s be honest: starting something new can be overwhelming. Where do you begin? How do you wrangle all your ideas into something cohesive? What tools actually help?

    Good news: I’m in the thick of this myself, and I’ve got your back. Here’s your go-to guide for organizing your passion project, featuring real tips from my experience working on “Preserve the Peaks,” a multimedia conservation campaign about Rocky Mountain National Park.


    Why Project Management Tools Are Game-Changers

    My “Preserve The Peaks” Project Plan in Trello.

    When you’re juggling tasks, ideas, deadlines, and research, using a project management system is a must. It gives you a visual structure for your work, helps you prioritize, and ensures you actually finish what you start.

    Some of the most popular tools out there include Trello, Asana, Notion, and Monday.com. Which one should you use? It all depends on your personal preferences and project style. Explore the features of each, and see which fits your organization style best.

    I chose Trello for my campaign. I love the card-based system, which lets me:

    • Create task checklists (there’s nothing more satisfying than checking something off)
    • Set due dates
    • Assign collaborators
    • Attach images and resources
    • Leave notes and updates

    For “Preserve the Peaks,” I divided my Trello board into sections by week and topic. Here’s a glimpse into how I broke it down:

    • Week 1: Research
    • Week 2: Organization
    • Weeks 3–4: Infographics and interactive posters
    • Weeks 5–6: Digital guide (PDF)
    • Week 7: Final packaging and project promotion

    Within each section, I created individual task cards and broke them into bite-sized and actionable to-do lists. The more detailed your checklists, the easier it is to stay on track.


    Mastering the Art of Annotated Bibliographies

    When your project management system is up and running, it’s time to dig into your research. You’ve probably already gathered sources, which is great! Now comes the part where you actually make sense of them.

    Start annotating your bibliography. For each source, write a few short paragraphs answering:

    • What is the source about?
    • Why is it important to your project?
    • How will you use the information?

    This make your research easier to reference later and also gives you a clearer picture of the themes and takeaways you want to emphasize.

    Some of the resources I used include:

    There are plenty of great resources out there on how to write an annotated bibliography if you want a template or tips!


    Creating a Project Plan That Works for You

    You’ve got your management tool. Your research is being annotated. Now it’s time to bring it all together in a clean, strategic project plan.

    Here’s what I included in my project plan:

    1. Project Management Approach: A quick overview of what platform I’m using (Trello) and how I’ve structured my boards and cards.
    2. Week-by-Week Action Plan: Each week has a clear focus with tasks tied to it, making progress feel achievable and steady.
    3. Visuals & Screenshots: Including screenshots of my Trello board helped make the plan more dynamic and transparent.

    Design your plan to match the tone of your campaign. Mine features the earthy, natural tones of the Rockies and a clean layout that’s easy to navigate. Treat it like an extension of your brand, and it will set the tone for the rest of your work.


    Let’s Get Creating

    Organization might not sound glamorous, but it’s the secret sauce to making your ideas a reality. By using tools that work for you, breaking tasks down into actionable items, and making sense of your research, you’re setting yourself up for success.

    I’ll be diving into infographic design next week. Stay tuned as I bring “Preserve the Peaks” to life!

  • Peaks and Projects: Turning a Passion for National Parks into a Content Creation Campaign

    Peaks and Projects: Turning a Passion for National Parks into a Content Creation Campaign

    How do you turn something you love into something you create? That was the question I had to answer recently when I started my Content Creation course at Quinnipiac University. For our class, we were given a big task: pick any subject, any medium, and use it as the foundation for a 7-week content project.

    No constraints. No templates. Just a blank page and total creative freedom.

    At first, that sounded exciting. But it also felt a little overwhelming. Where do you even start?


    Brainstorming a Passion Project

    When you’re told you can create anything, it can be hard to narrow it down, especially when you’re someone with a lot of interests. My best advice for brainstorming a passion project? Write everything down. Seriously. Don’t filter. Don’t overthink. Just make a big list of topics you’re passionate about, hobbies you love, causes that matter to you, and stories you want to tell.

    For me, that list included National Parks and Preservation, two things I deeply care about. I’ve had the chance to visit Rocky Mountain National Park over the past few years, and I knew I wanted to tell a story about it. The breathtaking views, the wildlife, and the feeling of traveling on Trail Ridge Road is something I will never forget. I wanted to bring my travel experience and my passion for preservation to the classroom.


    Researching Your Topic

    When I settled on Rocky Mountain National Park as my subject, the next step was research. This step is all about building a strong foundation for a multimedia campaign.

    I gathered information from trusted, multimedia sources such as:

    • The National Park Service’s official site
    • Documentaries like The Living Dream: 100 Years of Rocky Mountain National Park
    • Visitor blogs and trip reports
    • Podcasts from The Rocky Mountain Channel
    • Peer-reviewed climate research from the U.S. Forest Service
    • Interactive trail guides and conservation articles

    I wanted to understand the park from all angles: its history, climate challenges, visitor impact, and preservation efforts. These resources became the backbone of my proposed project.


    Introducing: Preserve the Peaks

    So, what is Preserve the Peaks? It’s a multimedia campaign designed to educate and inspire visitors to Rocky Mountain National Park to explore more thoughtfully and respectfully.

    • A series of infographics inspired by vintage national park posters
    • A set of interactive digital posters where users can click or scroll to reveal conservation facts and tips
    • A downloadable digital guide with practical advice, beautiful visuals, and essential park information

    These designs will be guided by one simple goal: to help visitors protect what makes the park so special: its peaks, wildlife, trails, and stories.

    You can check out my full project proposal here.


    Setting Campaign Goals and Schedule

    When planning this campaign, I outlined a few specific goals:

    • Educate travelers on how to safely and respectfully enjoy the park
    • Raise awareness about climate change’s impact on the park’s fragile ecosystems
    • Promote Leave No Trace practices among newer or infrequent visitors

    The campaign is designed for park visitors, especially first-time parkgoers, families planning trips, and younger travelers who are exploring national parks for the first time.

    Over the next seven weeks, I’ll be researching, designing, and refining content for this campaign. Weeks 1 and 2 are all about research. Weeks 3 and 4 are dedicated to creating infographics and interactive posters. Weeks 5 and 6 will focus on building out the downloadable guide. Week 7 will bring it all together.


    Final Thoughts and Advice

    If you ever find yourself faced with a wide-open creative project, here’s what I’ve learned so far:

    • Start by listing what you care about
    • Find the intersection between what excites you and what others might benefit from
    • Stay grounded in good research
    • And most importantly, create something you’d want to use yourself

    I’m excited to dive into Preserve the Peaks and share updates as the project unfolds. Whether you’re a fellow content creator, a park lover, or just someone who’s curious, thanks for following along.

    Stay tuned for more updates, and if you’re planning a trip to the Rockies, check out the official National Park Service site to start your adventure.

    Let’s protect the peaks, together.