Category: Audio and Video Design

  • Polishing in Premiere: Bringing My Mini-Documentary to Life

    Polishing in Premiere: Bringing My Mini-Documentary to Life

    Have you ever created a mini-documentary? The first step is planning. When you take pre-production seriously, everything gets easier later. You know what b-roll you want, your lighting is set up, and your subject feels ready to be interviewed. If you gather everything before filming, you’re going to be golden.

    And when you finally hit record, always film more than you think you need. It’s better to have extra clips you don’t use than to realize you’re missing something important.

    This week, after finishing pre-production and filming last week, I’m moving into post-production for my mini-documentary about my coach’s running journey with runner’s dystonia. Now it’s time to learn new editing techniques, tighten the story, and polish the video into a more professional piece. Let’s dive in.

    Reading + Writing

    Before reading The Bare Bones Camera Course for Film and Video by Tom Schroeppel, my video editing skills were pretty basic. I knew how to use simple tools in Premiere Pro, like the razor tool, but I did not fully understand audio transitions, video transitions, or how to create higher-quality video and sound. Going into this project, I wanted to improve the overall quality of my videos, and this book helped me do exactly that.

    Schroeppel starts with the basics, including how to properly use a camera and create visually pleasing compositions for both photos and video. This was an important foundation for me because it helped me think more intentionally about how I frame shots and what will look best to an audience. Learning these basics made me feel more confident behind the camera and more prepared when filming.

    One of the most helpful sections focused on audio. I learned how background music, sound effects, and ambient audio can greatly enhance a video when used correctly. Before this, I did not realize how much sound plays a role in storytelling. These techniques helped me understand how to create a more immersive and professional-feeling video experience.

    I also really enjoyed learning about lighting, especially three-point lighting. Before reading this book, I did not understand the importance of backlighting, especially when interviewing someone. Now I know how crucial it is to create an evenly lit environment that makes the subject stand out from the background. Good lighting, along with clear audio and strong composition, were the most important skills I gained from this reading.

    The area I struggled with the most was linear perspective and making sure not to cross the 180-degree line. This concept was challenging at first, but it helped me learn how to capture different angles that work together rather than clash. It pushed me to think more carefully about camera placement and movement.

    Overall, this book gave me a complete overview of how to shoot a strong video sequence and how to plan a project for success. The skills I learned will be incredibly useful for professional and promotional videos at work, personal projects, and even everyday photography and video. Moving forward, I want to continue learning more about lighting and experiment with using multiple cameras in future projects.

    Research to Inform

    1.) “Run, Forrest, Run” Movie Clip – Forrest Gump
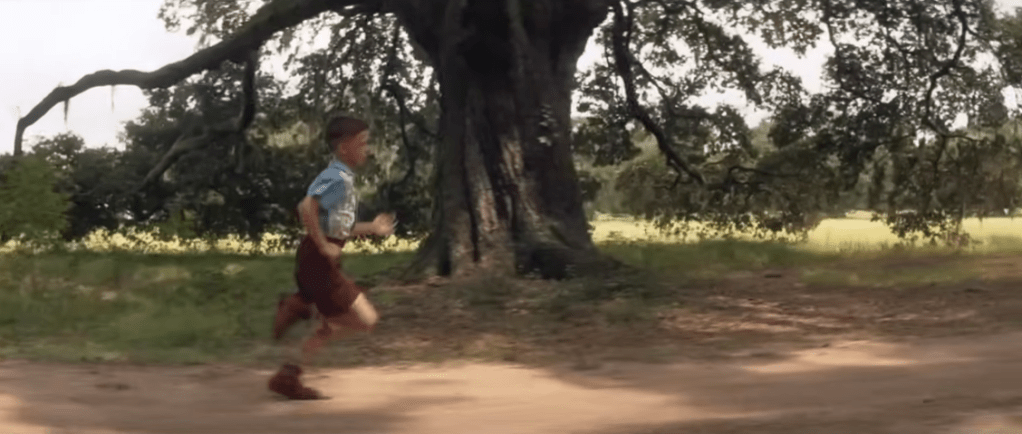
    This scene is a strong example of a J-cut. Around the 1:19–1:20 mark, we begin to hear Forrest’s voice as he talks about breaking out of his leg braces. At the same time, the visuals transition into a flashback from his childhood. Because Forrest’s voiceover begins before the visual fully shifts away from the bench scene, this moment is as a J-cut, where the audio from the next moment starts before the image changes.

    This editing choice works especially well because this is a major breakthrough moment for Forrest. Hearing his voice while watching the flashback helps show how deeply connected he is to this memory. It feels like he is reliving the moment rather than simply telling a story. Using this same technique in my mini-documentary would make sense, such as showing b-roll of my coach running on the track while her voice plays in the background, and then cutting back to the interview. This approach would help show how connected she is to her own story and experiences.

    2.) Harry Potter and the Sorcerer’s Stone – Hagrid Explains Harry’s Past
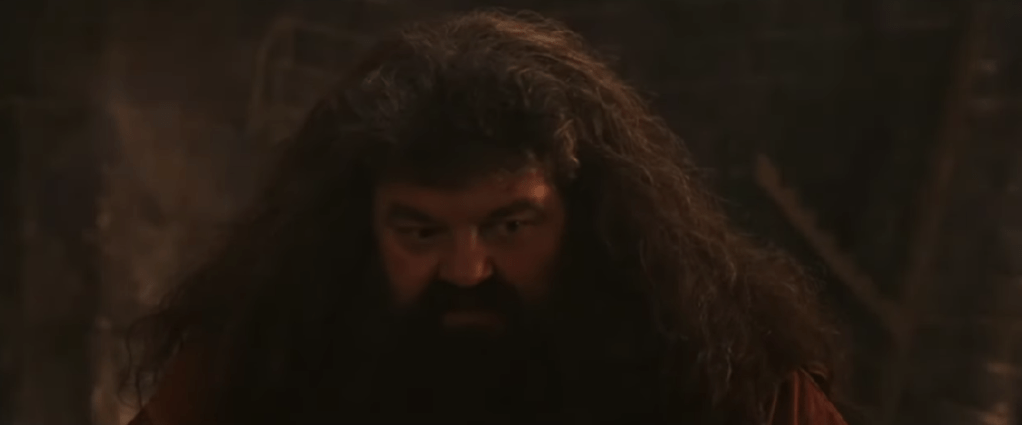
    This scene has an example of an L-cut, where the audio from one scene continues even after the visuals change. At the beginning of the clip, Hagrid is shown speaking to Harry. As the scene transitions into flashback clips from Harry’s childhood, Hagrid’s voice continues in the background. Because the audio carries over while the visuals shift, this moment qualifies as an L-cut.

    This editing technique helps ease the audience into the flashback. Instead of feeling like a sudden cutaway, the flashback feels more like a spoken memory being brought to life. Using this same approach in my mini-documentary would be effective when transitioning between interview footage and b-roll. Letting the interview audio continue over b-roll would help create smoother transitions and make the story feel more natural and connected.

    Create

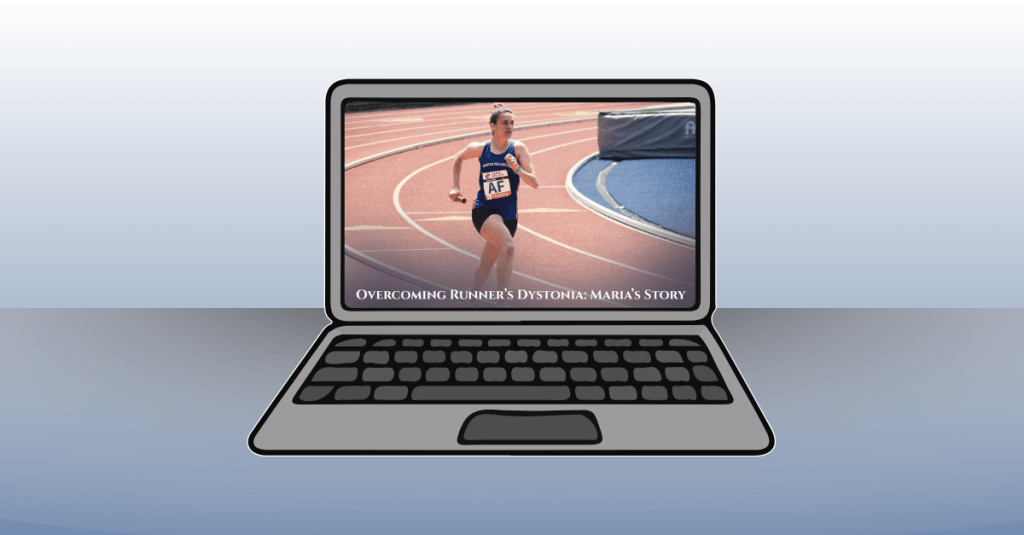
    Runner’s Dystonia: Maria’s Story of Resilience

    This mini-documentary tells the story of my high school running coach, Maria, and her journey with runner’s dystonia. The video follows her experience from running for over twenty years, through her diagnosis, and into her return to the sport she loves. My goal for this piece was to create a story that felt cinematic, honest, and hopeful, while allowing Maria’s voice to remain at the center of the narrative.

    I really enjoyed the process of creating this video from start to finish. From carefully planning the project, interviewing my coach, and filming b-roll at the track, to editing everything together, each step helped strengthen my skills. During editing, I focused on making the visuals feel warm and inspiring. I applied subtle filters to the track footage to give it the look of being filmed at sunrise, which helped reinforce the hopeful tone of the story.

    Music played a big role in setting the mood. I used a background track from bensound.com titled “Birth of a Hero,” which added to the cinematic feeling I was aiming for. To help the story flow smoothly, I used both J-cuts and L-cuts when transitioning between interview footage and b-roll. These techniques allowed Maria’s story to feel connected and uninterrupted, while also giving the visuals room to breathe.

    I let Maria tell her story in full and used my own narration to introduce the film, connect different parts of her journey, and bring the piece to a meaningful close. I also used lower-third graphics during the interview clips, adding small animations to make them feel polished and professional. In a few clips, I applied a Gaussian blur effect to remove minor visual distractions, and I slowed down certain shots to enhance the cinematic feel.

    Overall, this project helped me grow significantly in Premiere Pro and in my approach to visual storytelling. More importantly, I hope the story itself resonates with viewers. My goal was to create a piece where storytelling comes first, and where people facing runner’s dystonia, or any kind of setback or obstacle, can feel seen, encouraged, and inspired. It was a joy to bring this video to life.
  • Framing the Story: How I Planned My Mini-Documentary

    Framing the Story: How I Planned My Mini-Documentary

    This week was all about preparing to create my own mini-documentary, and the first step was figuring out what story I wanted to tell. When I decided on an idea, everything else started to fall into place: who I would interview, what I wanted to say in my narration, and what equipment I needed to bring to the shoot. Then came the fun part: planning out the shots. Medium shots, wide shots, close-ups, extreme close-ups…all the pieces that work together to build a visual story. I also had to think about how the audio would support the video so the whole project felt smooth, clear, and meaningful. Here’s a closer look at how I prepared to bring my mini-documentary to life.

    Reading + Writing

    To prepare for creating my mini-documentary, I read two chapters in Tom Schroeppel’s The Bare Bones Camera Course for Film and Video. These chapters highlighted the importance of getting high-quality shots through having a detailed plan before filming.

    Chapter 7: Lighting

    Chapter 7 explains the basics of both exterior and interior lighting and why it matters so much in filmmaking. For outdoor lighting, Schroeppel highlights how reflectors and full lights can help control the sun, which is your biggest and brightest light source. A reflector can be almost anything that bounces sunlight back onto your subject, helping soften shadows on the face. When shooting outside, fill lights should match natural daylight and have a color temperature of around 5400K, so the color of the shot stays consistent. The chapter also explains how outdoor lighting changes quickly, so filmmakers need to watch their shadows and adjust their tools to keep the shot balanced.

    Interior lighting works differently because the filmmaker controls all the light sources. Schroeppel describes three common types: focusing quartz lights, broads, and softlights. Focusing quartz lights act like spotlights and can adjust intensity and beam width. Broads create a wide, even wash of light but don’t have fine controls. Softlights bounce light off a curved surface, creating a smooth and diffused glow. The chapter also reminds us of the important trio: key light, fill light, and backlight. Using only a key light creates heavy shadows, adding a fill light adds depth, and a backlight helps separate the subject from the background. In my mini-documentary, this lesson is essential because I will be interviewing my coach indoors. I need to create a lighting setup that makes her look clear and natural, reduces harsh shadows, and separates her from the background so the interview feels professional.

    Chapter 9: Doing It

    Chapter 9 focuses on the big picture of planning and shooting a sequence. Schroeppel starts with a simple question: What do you want your audience to feel? Knowing your story goal helps you decide what footage you need and how you want to shoot it. The chapter stresses the value of preparing a strong shooting plan before filming. This includes gathering more footage than you think you’ll need, because it’s easier to cut extra clips than try to fix gaps later. Schroeppel also talks about using a slate, anything from a clapboard to a piece of paper, to label your shots. This helps you stay organized during editing and keeps all your footage easy to identify.

    The chapter also teaches how to build a shooting script using two columns: video on one side and audio on the other. This helps you match visuals with narration, interviews, and sound design. Schroeppel also prepares filmmakers for real-world challenges like working in uncontrolled environments where you can’t control everything happening around you. In those moments, it’s important to keep good composition, change up your camera angles, and maintain consistent screen direction. For my mini-documentary, this chapter ties directly into my planning process. I created a full shot list for both the interview and the b-roll, and I mapped out what narration and ambient sound would go with each clip. Because I’ll be filming at both a house and a public track, I’ll need to be flexible, watch my surroundings, and make sure I capture enough content, from close-ups of her running shoes to wide shots of her on the track, to tell a complete and engaging story.

    Research to Inform

    To prepare for my mini-documentary, I explored several videos that tell powerful stories through strong visuals, clear structure, and meaningful interviews. These examples helped me understand how filmmakers use pacing, b-roll, narration, and sound to guide an audience through someone’s personal journey.

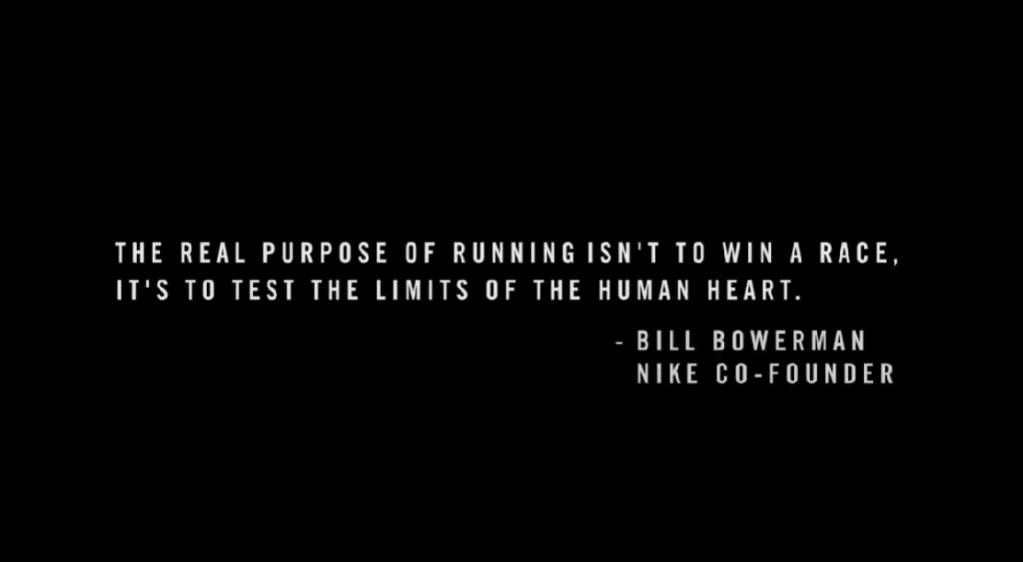
    1.) Nike’s “Breaking 2” Documentary Trailer

    The trailer for Nike’s Breaking2 documentary sets the tone for a powerful and visually striking story about athletes attempting to break the two-hour marathon barrier. It uses a mix of close-ups, wide shots, and atmospheric visuals to build anticipation and highlight the intensity of the challenge. We see runners preparing in quiet, focused moments before the race, along with glimpses of empty roads and early morning light that signal something historic is about to happen. The pacing starts slow and controlled and gradually builds energy, supported by strong visuals that show both vulnerability and strength. What makes this trailer so effective is how it combines emotion, high stakes, and purposeful imagery to make the viewer feel the pressure and possibility of the moment. This connects directly to my mini-documentary because my coach’s journey with runner’s dystonia also involves moments of hardship, reflection, and perseverance. Watching how Breaking2 builds emotion through pacing and shot variety helps me think about how to capture her own story, showing her quiet determination, the challenges she faces, and the strength she brings to every run. It reminds me that even small, simple moments can feel powerful when they are filmed with intention.

    2. HBO’s “Weight of Gold” – Trailer

    The Weight of Gold is a powerful documentary that goes behind the scenes with Olympic athletes to explore the hidden toll that elite sport can have on mental health, showing that even champions are humans with doubts, fears, and struggles. The film combines raw, honest interviews where athletes admit to depression, anxiety, and identity loss after their Olympic careers with haunting b-roll: empty arenas, silent training venues, and quiet moments of reflection. What works so well is the balance between their glamorous public achievement and the private emotional cost, which reminds viewers how much pressure and expectation lie behind medals.

    For my mini-documentary about my coach’s running journey, especially her experience with runner’s dystonia, The Weight of Gold is very relevant. It shows me how a sports story isn’t only about performance or victory, but about identity, struggle, and resilience. I can borrow its approach: using honest, vulnerable interviews; capturing quiet, raw visuals that reflect internal struggle; and juxtaposing hardship with strength and recovery. This model encourages me to show not only the physical side of running (the track, the stride, the motion), but also the emotional journey: the doubts, the setbacks, and the hope.

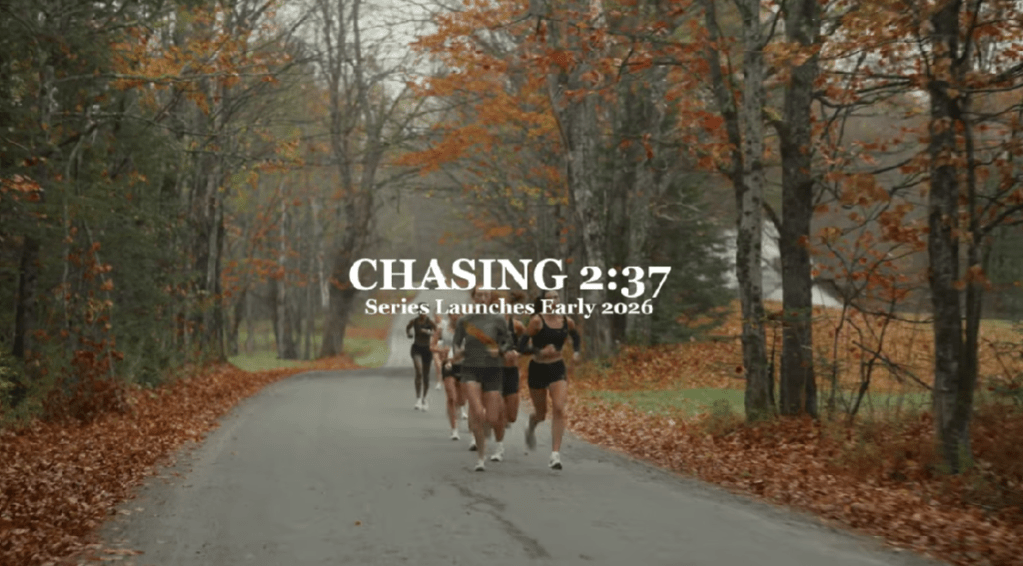
    3.) Tracksmith – Chasing 2:37 Trailer

    The Tracksmith video about a group of women chasing the 2028 Olympic Trials Qualifying time is a great example of strong visual storytelling. I loved how the trailer wove together multiple athletes’ backstories and used their voices as narration over dynamic b-roll, which created a sense of community and shared purpose. The filmmakers used a wide variety of shots, such as running sequences, training moments, lifestyle clips, that brought energy and depth to the story. At the same time, there were moments where the lighting felt inconsistent, especially in scenes that were darker and harder to see. This may have been a stylistic choice to create a cinematic, high-contrast mood, but it sometimes made the visuals feel less clear. I also wished the video had included interview shots of each woman who narrated, along with on-screen name graphics, so viewers could connect each voice to a face. Even though the storytelling was compelling, a few adjustments to lighting and shot clarity could make the piece even stronger. This example helps inform my own mini-documentary because it shows me the power of pairing voiceover with strong b-roll, while also reminding me to keep lighting consistent and include clear interview identifiers so my audience always knows who is speaking.

    Create

    Mini-Documentary Pre-Production Planning Document

    After reading and researching documentary-style videos about running and sports, it was time to plan out my own mini-documentary about my coach and her experience with runner’s dystonia. I started by identifying all the key details of the project, including the due date, length, overall feel, tagline, and elevator pitch. After the creative direction was determined, I wrote a set of interview questions that would guide our conversation and help her open up about her journey. I also drafted narration to help connect the different parts of the story. From there, I created a full list of b-roll ideas, background music options, sound effects, and ambient audio that would make the piece feel more cinematic. To read my full planning document, click here.

    After finishing the planning phase, I met up with my coach to film the interview and then went to a local track to capture b-roll. I shot a mix of wide shots, medium shots, and close-ups of her running, stretching, looking into the camera, tying her shoes, and even doing runner’s dystonia-specific exercises. I used a three-point lighting setup for the interview so the backlight would give her a soft glow and help separate her from the background. By the end of the shoot, I had interview footage, clear audio, and many visuals to support the story.

    Now that production is complete, it’s time to begin post-production. I will spend this week editing the video and audio clips, arranging the story in a clear and emotional way, and making sure the pacing feels smooth and intentional. I am looking forward to bringing all these pieces together and telling the running story of my coach in a powerful and meaningful way.

  • Hopping Between Angles: How I Created a Multi-Shot “How to Draw a Frog” Video

    Hopping Between Angles: How I Created a Multi-Shot “How to Draw a Frog” Video

    This week’s project invited me to step out from behind the camera and really think about what it takes to keep a video feeling smooth, intentional, and continuous, especially when it’s filmed from multiple angles. Learning the principles of continuity, from the 180-degree rule to linear action flow, turned out to be both fascinating and surprisingly meticulous. My challenge? Taking a simple how-to tutorial of drawing a frog and transforming it into a cohesive, multi-angle learning experience without a single distracting jump cut.

    Before I knew it, I was recording the same drawing sequence three different times, checking hand placement, pencil positioning, and even the direction my paper faced to make sure every take lined up. It was an interesting and very hands-on introduction to continuity in action.

    Let’s dive into how I created the video, one angle at a time.


    Reading + Writing

    Chapter 3: Basic Sequences

    In The Bare Bones Camera Course for Film and Video, Tom Schroeppel breaks down the idea of a basic sequence as the backbone of visual storytelling. A basic sequence starts with a wide shot to establish the scene, followed by medium shots to bring the viewer closer, and then close-ups to highlight important details. Schroeppel emphasizes that an establishing shot doesn’t need to show everything; just everything that matters. When the viewer understands the setting, the editor can move between different shot sizes to create visual variety and maintain interest. He also explains the importance of cutting on the action, which keeps movement fluid and continuous, making transitions feel natural instead of abrupt. Clean entrances and clean exits, which are moments when a subject fully enters or leaves the frame, help editors hide cuts more effectively and avoid jarring visual gaps. Cutaway shots, such as zooming into a detail or shifting briefly to a new angle, are another essential tool to smooth transitions and avoid jump cuts.

    These principles became the foundation of how I structured my “How to Draw a Frog” video. Even though the content was instructional rather than narrative, I still needed to build a clear visual sequence. I started with a wide shot of my workspace so viewers could get oriented—where the paper was placed, how the lighting looked, and where my hands would be moving. From there, I alternated between medium shots and close-ups to focus attention on the frog’s outline, shading, and finer details. Each angle change involved a shift in both image size and camera position, just as Schroeppel recommends, which kept the video dynamic without feeling chaotic. I also shot clean entrances and exits of my pencil strokes so I could cut directly on the motion of drawing. This helped maintain continuity when switching between angles and avoided the jarring “jump” that can happen when a line appears half-drawn suddenly. Understanding these fundamentals shaped how I approached each take and, ultimately, how the video flowed.

    Chapter 4: Screen Direction

    In Chapter 4, Schroeppel introduces screen direction, a principle built around the idea that audiences rely on consistent orientation. Screen direction refers to the direction people or objects appear to be facing or moving on screen. To keep this consistent, filmmakers must avoid crossing the line, also known as the axis of action. This imaginary line runs through the scene, and when a camera is positioned on one side, it should stay there. Crossing to the opposite side reverses the direction of movement or orientation on camera, confusing viewers because actions will suddenly appear mirrored. Schroeppel notes that you can cross the line if you “stop on it,” meaning the camera moves to a neutral, straight-on view first. This neutral shot resets the viewer’s orientation so the camera can then shift to the opposite side without disorientation. As long as the axis remains respected, the camera (and the objects in the scene) can move freely without breaking continuity.

    Even though my project involved drawing rather than actors walking across a set, screen direction played a huge role in keeping my frog tutorial coherent. My “axis” ran across the table between me and the paper. When I chose which side of the table my camera would film from, I committed to that side for all three angles. If I had switched sides midway, the frog would have appeared flipped, and the direction of my hand’s movement would have reversed, making the drawing process much harder to follow. Keeping the axis consistent ensured that viewers always knew where they were in relation to the drawing. This principle, though subtle, helped avoid confusion and reinforced the continuity I aimed for throughout the video.


    Research to Inform

    To better understand what strong continuity looks like in professional film and television, I explored several examples across genres. Watching how filmmakers maintain consistency across multiple angles helped me think more critically about how to construct my own multi-angle “How to Draw a Frog” video. Below are three pieces that demonstrate excellent continuity, along with one famous slip-up that shows just how noticeable it can be when continuity goes wrong.

    Example 1: Harry Potter and the Prisoner of Azkaban – Divination Class Scene

    In the Divination class scene, the film repeatedly cuts between wide shots of the classroom and medium or close-up shots of the students’ faces, but spatial orientation remains consistent. For example, when we see a wide angle of the classroom showing several desks and students in their positions, and then cut to a close-up of one student (Harry, Ron, and Hermione), their position in the room retains logical consistency relative to the wide shot.

    What makes this scene a strong example of continuity editing is how it balances variety and clarity. By switching between wide, medium, and close-up frames, the film keeps the viewer’s attention while still grounding them in the classroom’s layout. There’s no confusion about who is where; the “line,” or axis of the room, remains consistent.

    Example 2: The Office (U.S.) – Table Scene with Dwight, Michael, and Jim

    The Office is very careful about continuity and screen direction when cutting between different camera angles. In this scene where Dwight, Michael, and Jim sit at a table, the camera stays on one side of them. When it cuts between close-ups and medium shots, each character remains oriented the same way: left stays left, right stays right, and each face continues to look in the same direction relative to the frame.

    This consistency in screen direction helps maintain the illusion that the viewer is observing a real conversation. Because the camera never “crosses the line”, the sense of space stays stable. That stability is essential because it helps the audience follow dialogues and reactions without disorientation.

    Example 3: The Hunger Games – Training Center Sequence

    In the Training Center scene from The Hunger Games, continuity is used to create clarity as the camera cuts between multiple tributes practicing their survival skills. Although the sequence showcases a wide variety of activities, like climbing monkey bars and solving memory puzzles, the filmmakers keep the camera positioned on one consistent side of the training floor. When the angle shifts from a wide shot of the whole space to a close-up of a specific tribute, or different shots of one tribute, the direction of movement remains visually consistent.

    For example, the tribute climbing the monkey bars is always shown moving in the same on-screen direction, even as the camera switches from a front angle to a tighter close-up. The same is true for Foxface solving her puzzle: no matter the shot size, the camera maintains the same viewpoint, keeping her orientation consistent. Because the editors never cross the axis of the room, the viewer doesn’t have to “remap” the space with every cut.

    Break in Continuity: Pretty Woman Breakfast Scene

    One example of continuity going wrong appears in Pretty Woman during the breakfast scene. Julia Roberts’ character is eating a croissant in one shot, but when the camera cuts to a different angle, it has magically become a pancake. Then, in another shot, the croissant reappears. This kind of mistake happens when props aren’t carefully tracked across takes, and the result is immediately distracting even for casual viewers.

    Seeing this reminded me how small details can unravel continuity. In my project, something as simple as the length of a pencil line, the angle of my hand, or the placement of my paper could create that same kind of inconsistency. To avoid my own “croissant-to-pancake moment,” I was extra intentional about replicating my drawing motions across each angle.


    Create

    After I fully understood the principles of continuity and how multi-angle shooting works, I started to create my own “How to Draw a Frog” video. My goal was to build a clear, easy-to-follow tutorial while using a variety of camera angles to make the video more engaging and visually dynamic. I filmed from three angles: a wide establishing shot, a medium shot focused on the paper, and a close-up shot highlighting the finer details of the drawing. The establishing shot served as the anchor for viewers as I used it to introduce each new step of the drawing. The medium and close-up were used to show the drawing, allowing the audience to see each pencil stroke clearly.

    One of the most important decisions I made early on was choosing one consistent viewpoint and committing to it for every angle. By staying on the same side of the table, I ensured that my hand, the frog’s outline, and the direction of the drawing all appeared consistent, no matter which camera angle I cut to. This was especially crucial during close-up shots: if the orientation flipped or the paper suddenly rotated, the viewer would feel disoriented. Filming on the same side helped maintain a smooth visual rhythm and kept all of the camera transitions feeling intentional rather than distracting.

    Beyond the visuals, I also incorporated audio and motion design to enhance the tutorial. I recorded narration explaining each step, paired with on-screen text to signal transitions throughout the video. I added a background music track to create a warm, encouraging atmosphere and included playful sound effects, such as a frog ribbit at the beginning and a typewriter click to complement the opening animation. To make the introduction stand out, I designed a short animated sequence in After Effects.

    While I loved the creative freedom of this project, it also presented some challenges. Drawing the same frog multiple times from different angles meant I had to think carefully about everything: from how I held the pencil to how dark or light I shaded certain areas. Even small inconsistencies could break continuity, so I had to stay mindful throughout the entire process. It was definitely a test in precision and patience, but it helped me practice my skills in filmmaking. This project gave me a deeper appreciation for how video creators use continuity throughout their projects, and it was rewarding to follow those principles in this project.

  • Behind the Lens: Inside the Making of My Video Montage

    Behind the Lens: Inside the Making of My Video Montage

    After all the planning, scripting, and storyboarding from last week, it was finally time to bring my video montage to life. This week’s focus was on production and post-production, filming the shots I planned at Valley Forge National Park and then editing them together into a cohesive story. From setting up my camera and capturing the perfect lighting to layering narration, sound effects, and background music, this stage brought all the preparation together. Every detail, from the angle of a shot to the rhythm of the edit, played a role in shaping how the story feels on screen. Let’s walk through the steps I took to capture, edit, and finalize my video montage this week.

    Reading and Writing

    This week, I read Chapter 10: After the Shoot – Editing from Tom Schroeppel’s The Bare Bones Camera Course for Film and Video. This chapter explained what happens when filming is done and how important it is to stay organized and intentional when editing a project. Schroeppel starts by reminding readers that our eyes naturally see the world with a view of about 25 degrees wide, which means editing needs to help guide the viewer’s attention in a clear and meaningful way. One of his first suggestions is to read the script before editing, so you understand how you want your audience to react to your video. Knowing the emotion or message you want to communicate makes it easier to choose which clips to use and how to arrange them.

    Schroeppel also emphasizes the importance of logging all material with as much detail as possible. This can be done in the field or right before editing. Using consistent keywords, labeling shot types (like MS for medium shot or CU for close-up), and marking clips as “good” or “NG – no good” helps keep everything organized. This makes the editing process move faster and reduces stress. He also introduces the idea of a paper edit, which is when you cut up pieces of your editing log and arrange them on a table or floor to plan the order of your video. This allows you to rearrange sections easily until the sequence feels right.

    When it comes to actual editing, Schroeppel suggests starting with an establishing shot so viewers know where they are right away. This prevents confusion and lets the audience focus on the message instead of trying to figure out the location. He recommends using basic sequences by cutting back and forth between related shots in the same setting, and making sure each shot is different enough to keep things visually interesting. Pacing is also important: a good editor guides viewers smoothly from shot to shot without distracting them.

    Schroeppel also highlights how powerful sound is in editing. Background music can help set the mood, reinforce the message, and tie the whole piece together. He explains that music should stay truly in the background, not too loud or too bold, so it supports the visuals rather than distracts from them. He also explains the goal of sound mixing: to improve the quality of the original audio and blend voice, music, and sound effects into one clear, effective track. After editing, Schroeppel recommends sharing the video with someone from your target audience or a friend to get feedback. Sometimes fresh eyes help catch things you missed, giving you a chance to make final adjustments.

    Overall, this chapter gave me a much better understanding of how careful planning, thoughtful editing, and strong sound design can bring a video project together. These tips helped me a lot during the production and editing of my video montage this week.

    Research to Inform

    To better understand how different editing choices can shape the mood and message of a video, I watched several examples that use a variety of editing techniques. I looked at videos with fast cuts, slow pacing, creative transitions, and strong sound design to see how each creator used editing to tell their story. Studying these examples helped me learn what kind of editing style I connect with the most and what techniques I want to use in my own video montage. By paying attention to elements like transitions, pacing, sound effects, and background music, I was able to get a clearer idea of how I want my final piece to look and feel.

    1.) “You Can’t Stop Us” – Nike Ad

    In Nike’s “You Can’t Stop Us” commercial, one of the most powerful editing tools is the split screen. The screen is divided so that different athletes and actions appear side by side, and often an action on the left will match perfectly with an action on the right, like a tennis serve transitioning into a basketball shot. This visual design shows that all sports are connected and that athletes everywhere are united as one movement. The background music is uplifting and hopeful, giving the viewer a sense of possibility and encouragement. The shots change every five to six seconds, which is just long enough to see the action clearly but short enough to keep the energy high and moving. Together, the split screen, the rhythm of the cuts, and the inspiring music tell a story of endurance, unity, and hope.

    2.) Student-Led Tour of Harvard University

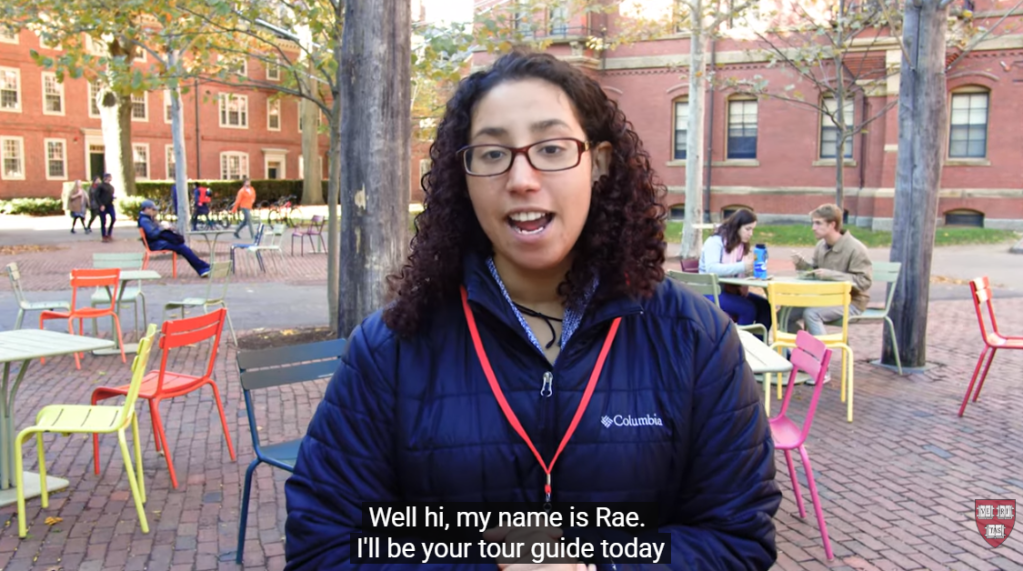
    In this student-led campus tour video of Harvard University, one of the techniques that really stands out is the transition between locations: the videographer speeds up the walking shots between buildings to move smoothly from one place to the next. This creates a natural “bridge” between scenes, so you don’t just jump from one building to another without context. The shots of each building or location are long enough (about 5 seconds) that you can actually look at the architecture and feel the space, and during those longer shots the videographer uses pans and tilts to showcase the size and detail of the buildings. The background music is upbeat and energetic, matching the excited tone of the voice-over, which makes the viewer feel as though they’re walking through the campus themselves. By using these transitions, the creator keeps the viewer engaged and helps them feel like they are on the campus tour.

    3. Paris 2024 Olympics | Official BBC Trailer

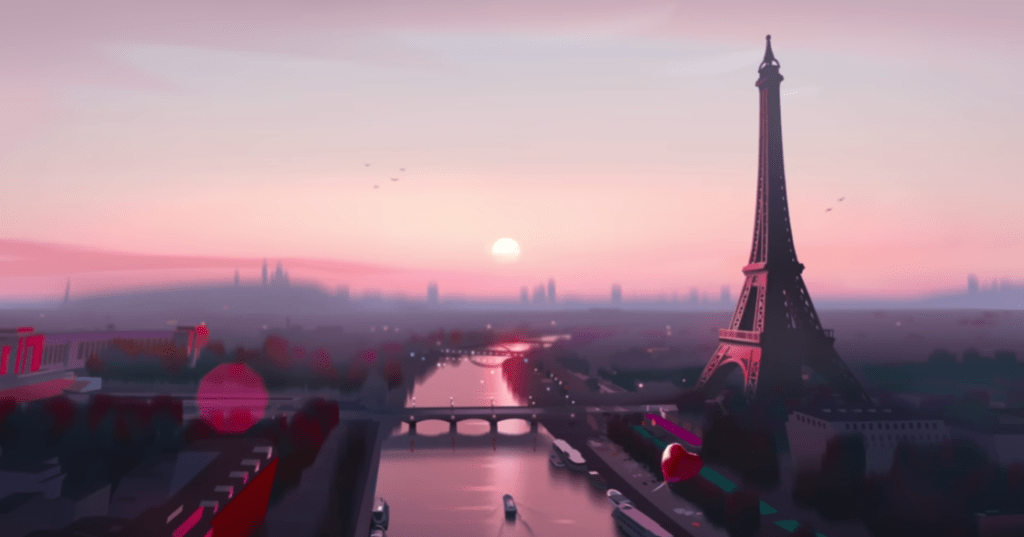
    Another strong example of fast editing is the Paris 2024 Olympics Official BBC Trailer. This video uses quick transitions and fast cuts to capture the excitement and nonstop action of the Olympics. Each scene only stays on the screen for a few seconds before jumping to the next sport, which keeps the viewer’s energy high. The transitions are quick cuts between animated versions of each sport, making the entire trailer feel sharp and rhythmic. The sound design also stands out as each animation has a sound effect that matches the sport, like a splash for swimming, cheering crowds for track and field, and the thud of a gymnast landing. These audio cues help the viewer feel connected to each moment. The video also uses a consistent color palette, which keeps the animations feeling unified and gives the trailer a strong brand identity. The deep, cinematic voiceover adds contrast to the fast visuals and helps the trailer feel like the preview for an epic movie. The mix of fast edits, bold animations, and dramatic narration creates a sense of excitement that reflects the anticipation and global scale of the Olympics.

    Create

    Valley Forge National Park Video Montage

    For my video montage at Valley Forge National Park, my main goal during production was to capture a wide variety of shots and locations. I wanted as much content as possible so I could choose the strongest clips later. I visited the Valley Creek Trail, the Covered Bridge, the National Memorial Arch, the Von Steuben Statue, the Washington Memorial Chapel, and several other areas throughout the park. While filming, I tried to get a mix of establishing shots, wide shots, medium shots, close-ups, and extreme close-ups to help keep the final video visually interesting. During editing, I used tools like Brightness and Contrast to even out the lighting between clips because the weather changed from sunny to cloudy as I filmed. I also used a Gaussian blur to soften small blemishes on the footage and the trim tool to shorten shots and tighten the pacing. I added cross dissolve transitions between each location to show viewers when we were moving from one place to another, and I used straight cuts when switching between different angles of the same landmark to make the scenes feel connected. For audio, I layered in ambient sounds like soft wind, birds chirping, water flowing, and leaves crunching to help set the scene. I also included sound effects such as footsteps on gravel, a cabin creaking, a train passing, and gentle church bells to match each location. My background music is calm and peaceful, and I chose it to help create a warm, welcoming mood. Overall, this project was a lot of fun, and I was happy that I could avoid filming people in the park. Planning my script and shot list ahead of time made filming much easier, and I learned a lot about both audio and video editing while creating a cohesive montage of Valley Forge National Park.

  • The Blueprint Behind the Camera: Planning the Perfect Montage

    The Blueprint Behind the Camera: Planning the Perfect Montage

    Before any great video comes to life, there’s a moment of stillness: a pause to plan, to visualize, and to prepare. This week’s focus was all about that pre-production stage: learning the basics of cameras, mastering composition, and framing shots that tell a story before a single line of dialogue is spoken. Through exercises in photography, storyboarding, and scripting, I’ve learned that the magic of video doesn’t just happen in the edit; it starts long before the camera ever records. Planning isn’t just a step in the process; it’s the foundation that makes everything else run smoothly. Let’s dive into how I prepared to bring my video montage to life this week.

    Readings and Writings

    To get ready for my video montage, I started by reading a few chapters from The Bare Bones Camera Course for Film and Video by Tom Schroeppel and some articles about pre-production and storyboarding. These readings helped me understand that making a great video is all about planning, understanding your camera, and knowing how to tell a story through visuals.

    The Bare Bones Camera Course for Film and Video

    Chapter 1: Basics

    Chapter 1 of The Bare Bones Camera Course for Film and Video explains how a camera works and why it’s important to understand the basics before filming. Schroeppel describes how the camera “sees” through a lens that gathers light reflected off objects. That light passes through the lens and lands on a sensitive surface inside the camera. In digital cameras, this surface is an image sensor, either a CCD (charge-coupled device) or a CMOS (complementary metal oxide semiconductor), which turns light into an electronic image. A key part of this process is exposure, or how much light reaches the sensor. Too much light causes overexposure, making an image too bright, while too little light causes underexposure, making it too dark. Exposure is controlled by three main settings: aperture, shutter speed, and ISO.

    Schroeppel explains that aperture is the opening in the lens that lets in light, measured in f/stops like f/2, f/4, or f/8. Think of f/stops like fractions: the smaller the number, the bigger the opening, and the more light comes in. This setting also affects depth of field, or how much of the image is in focus. A low f/stop creates a blurry background, while a high f/stop keeps more of the scene sharp. ISO, which stands for the International Organization for Standardization, controls how sensitive the camera is to light. A low ISO (like 100) works well in bright light, while a high ISO (like 800 or 1600) is better in darker places but can make the image look grainy. Schroeppel also discusses how different lens angles (wide, normal, and telephoto) change how the viewer experiences a shot. Understanding these basics helps filmmakers control how their videos look and tell a story through light, focus, and composition.

    Chapter 2: Composition

    Chapter 2 of The Bare Bones Camera Course for Film and Video focuses on how to compose and frame a shot to make it visually appealing and balanced. Schroeppel explains that using a tripod keeps your camera steady and helps you focus on the creative side of filming. He introduces the rule of thirds, a simple grid that helps position your subject in a more natural way. He also talks about headroom (the space above a person’s head) and lead room (the space in front of where someone is looking or moving). Getting these right makes a shot feel comfortable to the viewer. Schroeppel also notes that color can affect balance. Bright or bold colors pull attention, so it’s important to use them carefully.

    The chapter also explores how angles and backgrounds shape the mood of a shot. Shooting at eye level makes the subject feel equal to the viewer, while a bird’s-eye view can make them seem small and a worm’s-eye view can make them look powerful. Even slightly tilting the camera can add depth and energy. Schroeppel also encourages filmmakers to find frames within the frame, like using a window, doorway, or tree branches to draw attention to the subject. Lastly, he reminds readers that a good background should enhance the shot, not distract from it. Overall, this chapter taught me that thoughtful composition helps turn a simple image into a powerful story.

    Chapter 5: Camera Moves

    Chapter 5 focuses on how to make camera movement look smooth and purposeful. Schroeppel explains that cameras can move in a few main ways: zooms, pans, and tilts. A zoom-in brings the viewer closer to the subject, while a zoom-out pulls back to reveal more of the scene. A pan is a horizontal movement, turning the camera left or right, and a tilt is a vertical movement, tilting the camera up or down. Each move changes how the viewer experiences a scene, so it’s important to use them with intention.

    One of Schroeppel’s biggest tips is to begin and end every move with a steady, well-composed static shot. This helps the movement feel more natural and keeps the viewer grounded. When combining moves, like zooming while panning or tilting, he suggests starting the pan or tilt just a split second before the zoom. This small detail makes the transition feel smoother and more professional. Overall, this chapter highlights that camera movement isn’t just about motion; it’s about control, timing, and knowing when to let the camera stay still.

    Chapter 6: Montages

    Chapter 6 focuses on the art of creating a montage, which Schroeppel defines as a series of related shots used to condense time or distance, set a mood, or summarize information. Montages are a great way to show progress, change, or emotion without needing long scenes or dialogue. They help the viewer understand a lot in a short amount of time and can add energy or rhythm to a story.

    Schroeppel explains that a successful montage depends on variety. Each shot should look clearly different from the one before it to keep the viewer interested. This can be done by changing angles, shot sizes, and perspectives throughout the sequence. Mixing close-ups, wide shots, and medium shots adds visual excitement and helps tell the story more clearly. Overall, this chapter shows that montages aren’t just a collection of random clips; they’re carefully planned sequences that make storytelling faster, smoother, and more visually engaging.

    Supplemental Articles

    Video Pre-Production Planning Check-List – 11 Steps to a Successful Project

    In this article, Jacob Trussell explains that great videos start with careful planning. Before you ever start filming, it’s important to think through every step of the process, from setting goals to editing the final cut. Trussell shares that a solid video production checklist keeps everything organized and helps avoid surprises later on. Planning ahead not only saves time and money, but also makes the creative process smoother and more enjoyable.

    Trussell outlines fifteen key steps to a successful video production. These include defining your goals and identifying your audience, developing a clear message, creating a budget, and deciding where your video will live once it’s done. He also stresses the importance of storyboarding and scripting before filming, as well as scouting locations, organizing equipment, and building a realistic schedule. Finally, he highlights the last stages of shooting, editing, and distributing your finished video. Overall, Trussell’s article reinforced what I’ve learned this week: when you take the time to plan your shots and structure your story, production becomes less stressful and a lot more creative.

    Learn What is a Storyboard and How to Use it to Make Better Videos

    This article explains that a storyboard is like a comic strip version of your video that helps you plan out each shot before filming. Storyboards make it easier to visualize how scenes will look, organize camera angles, and communicate your ideas to others. The article breaks down the process into simple steps: plan your video’s goal and message, visualize each scene, add notes about timing and action, and review your storyboard with others for feedback. It also points out common mistakes, like making storyboards unclear or too detailed. Overall, the article shows that storyboarding helps save time and money while making your final video stronger and more focused.

    Acting Tips: 12 Camera Shots Every Actor Should Know

    In this article, the New York Film Academy explains that understanding common camera shots is important for anyone working in film or video production. The article introduces twelve popular shot types, such as the aerial shot, which captures a scene from high above; the establishing shot, which sets the location; the close-up, which focuses on a person’s face or detail; and the wide shot, which shows the subject within their environment. Each shot type helps tell a different part of the story and creates a unique emotional effect for the audience.

    The article also discusses how camera angles can shape how we see a subject. A low-angle shot can make someone appear powerful or confident, while a high-angle shot can make them seem smaller or more vulnerable. By combining different angles and shot sizes, filmmakers can guide the viewer’s attention and influence how a scene feels. This article helped me recognize how much thought goes into framing and shot selection. Every choice behind the camera adds meaning to the story being told.

    Research to Inform

    After reading about camera basics and composition, I wanted to see how these principles work in real life. For this section, I researched examples of visual composition in action to better understand how filmmakers use framing, angles, and color to tell a story.

    1.) No Human Is Limited: Natural Frames in the Scene

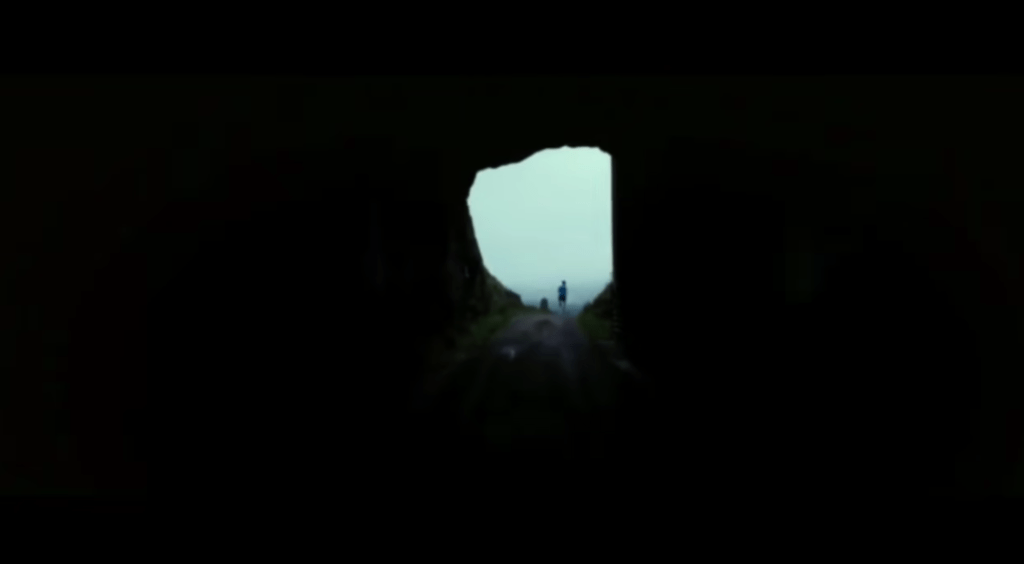
    One strong example of visual composition in action comes from the short video “No Human Is Limited.” At the 24-second mark, there’s a striking shot that perfectly demonstrates the use of natural framing. In this scene, a runner emerges from a dark tunnel into the light. The tunnel itself forms a natural frame around the runner, directing the viewer’s attention straight to the subject. The sharp contrast between the dark surroundings and the light on the runner symbolizes determination and possibility, echoing the film’s message that no human is limited. As the shot transitions into a wide, open landscape, it visually reinforces the idea that the world is full of endless opportunities, and that perseverance can carry someone beyond any obstacle.

    2.) Hunger Games (District 12 Reaping): Shallow Depth of Field + Close-Up

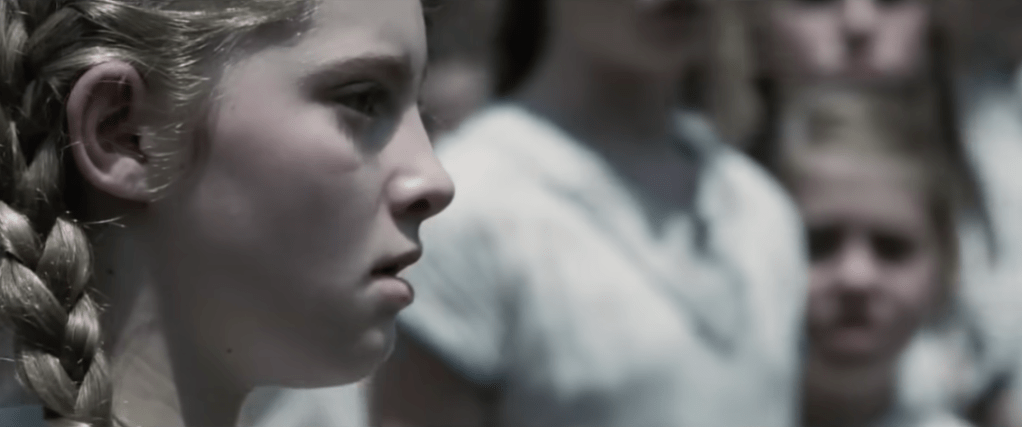
    Another strong example of visual composition can be seen in the first Hunger Games movie, during the scene when Primrose Everdeen is chosen to compete in the Games. The filmmakers use a shallow depth of field and a close-up shot of Prim’s face to capture the emotional intensity of the moment. The crowd behind her fades into a blur, drawing all attention to her expression of shock and despair. This visual choice highlights the weight of what’s happening: how one small, personal moment can carry enormous emotional impact. By isolating Prim from the background, the scene makes the audience feel her fear and confusion, almost as if time itself has slowed down to focus on her.

    3.) Pirates of the Caribbean – First Scene of Jack Sparrow: Rule of Thirds

    A great example of the rule of thirds can be found in the opening scene of Pirates of the Caribbean when Jack Sparrow is introduced for the first time. As the camera pans to the front of him, Jack is positioned along the left vertical line of the rule of thirds grid, rather than in the center of the frame. This placement makes the shot more visually interesting and dynamic. The composition also feels balanced because part of the ship fills the right side of the frame, near the opposite third, creating symmetry and visual appeal. This thoughtful use of framing not only makes the scene engaging but also subtly communicates Jack’s confidence and larger-than-life personality right from the start.

    Create

    After learning about visual composition, camera techniques, and studying real examples, it was finally time to put what I learned into practice. This week’s creative exercises helped me apply these principles and build confidence behind the camera. I completed a photography scavenger hunt to practice framing, balance, and lighting, and I also worked on a pre-production planning document that included storyboards for my upcoming video montage.

    Photo Scavenger Hunt

    As part of my preparation for the video montage, I completed a photo scavenger hunt to practice taking still shots in nature, since I plan to film my final project at a national park. This exercise helped me apply visual composition principles such as the rule of thirds, depth of field, and leading lines while experimenting with different angles and natural frames. Taking photos outdoors allowed me to observe how light, shadow, and perspective change depending on the time of day and my camera settings. It was a great hands-on way to strengthen my eye for composition and better understand how each technique can shape the story I tell through visuals. To view my full collection of photos from the scavenger hunt, click here.

    Pre-Production Planning Document with Storyboards

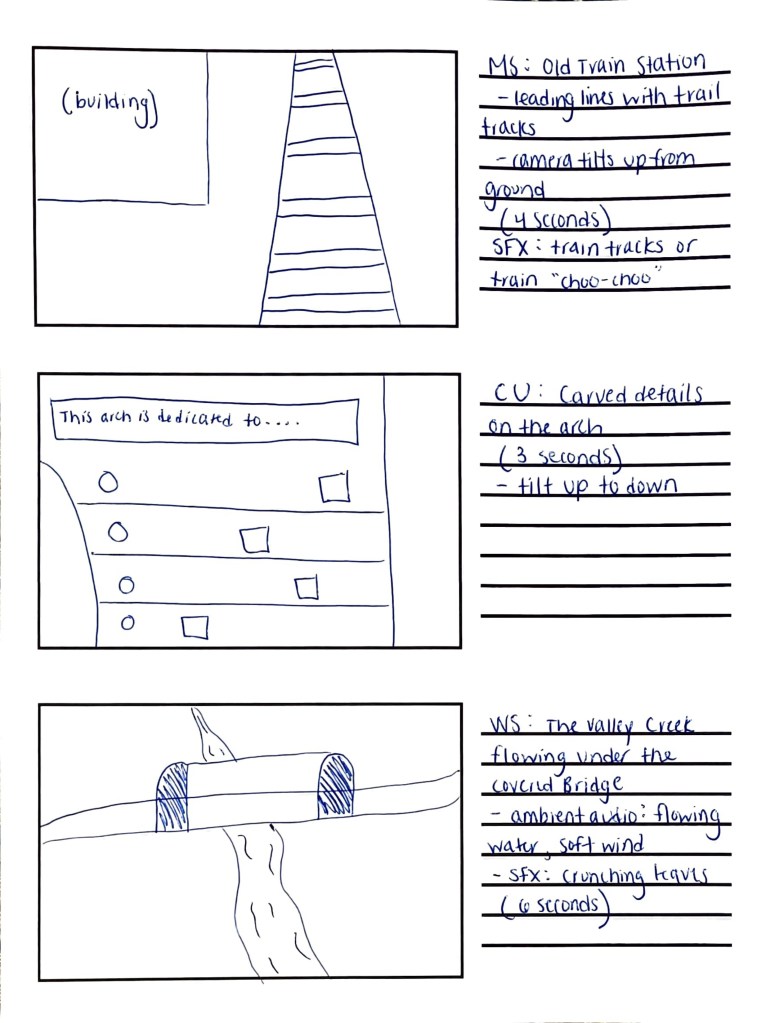
    I also completed a pre-production planning document to organize every part of my upcoming Valley Forge National Park video montage. This included writing the script and narration, identifying sound effects, ambient audio, and background music, and planning out what each shot will look like. I created a detailed storyboard to visualize the flow of the montage and make sure the transitions feel smooth and intentional. Going through this process helped me develop a clear plan for filming, so when I visit the park this week, I’ll know exactly what to capture, how to frame it, and how the visuals will connect with the audio to tell a cohesive story. To view my full planning document, click here.

  • From Script to Sound: Bringing My Podcast to Life

    From Script to Sound: Bringing My Podcast to Life

    Last week was all about planning: brainstorming ideas, writing a script, and finding the perfect background music and sound effects to set the mood. This week, it was time to hit record. After completing the pre-production process, I focused on turning my plan into a polished podcast episode. I edited my script several times, learned how to record clear, high-quality audio, and spent time experimenting in Adobe Audition and Premiere Pro to mix my voice, music, and sound effects together. It was a hands-on, creative process that helped me understand how all the pieces come together to tell a story through sound. Let’s dive into the steps I took this week to make it happen.


    Readings & Writings

    To kick off this week’s project, I started by reading “7 Secrets for Getting Pro-Sounding Vocals on Home Recordings” by Filippo Gaetaini. The article focuses on making high-quality vocal recordings with the tools you already have at home. Gaetaini shares practical tips that go beyond just having the right microphone: he emphasizes creating the right environment and mindset for recording.

    One of the first tips is to get in the zone by setting the right ambience and making sure you feel comfortable while recording. Then, he suggests hacking your bedroom by using everyday items like blankets, curtains, or pillows to reduce echo and create a DIY vocal booth. He also explains how important it is to position your mic and pop filter correctly, keeping the microphone’s diaphragm facing your lips for the clearest sound.

    Another key takeaway is to check your mic levels and let your mic warm up before recording. Gaetaini encourages recording several takes because your best performance might not come until the fifth, or even tenth, try. Finally, he reminds readers to be careful with editing and vocal processing. Too much editing can make a track sound unnatural, so it’s best to experiment until you find what feels right. These reminders made me realize that good audio isn’t just about technology; it’s about patience, practice, and finding a natural rhythm in your voice.

    The second article, “Sound Advice: Editing Audio for Video” by Videomaker, explores how sound editing can elevate a video from average to engaging. The piece highlights how A-roll (the main footage) and B-roll (supplementary footage often used with voiceovers) work together to tell a story. The article also explains technical terms like insert edits, where new video is inserted into the main footage, and L-edits, or split edits, where the audio and video transition at different times for a smoother, more natural feel.

    The article provides a clear process for editing audio in video projects: first import and assemble your main clips, then trim and refine your edit. After that, it’s important to listen carefully for choppy transitions, audio glitches, or uneven volume. If something still doesn’t sound quite right, adding background music can help mask small imperfections and enhance the mood. The article also recommends using post-processing techniques like light compression, limiting, and equalization to “sweeten” the final track.

    Both readings helped me better understand how sound design shapes storytelling through voice, background music, and editing choices. They reinforced how much thought and care go into creating professional-sounding audio, even with simple tools.


    Research to Inform

    To better understand how audio can transform a story, I explored several examples that skillfully combine visuals with music, dialogue, and sound effects. Each example offered inspiration for how I could use sound to enhance my own podcast.

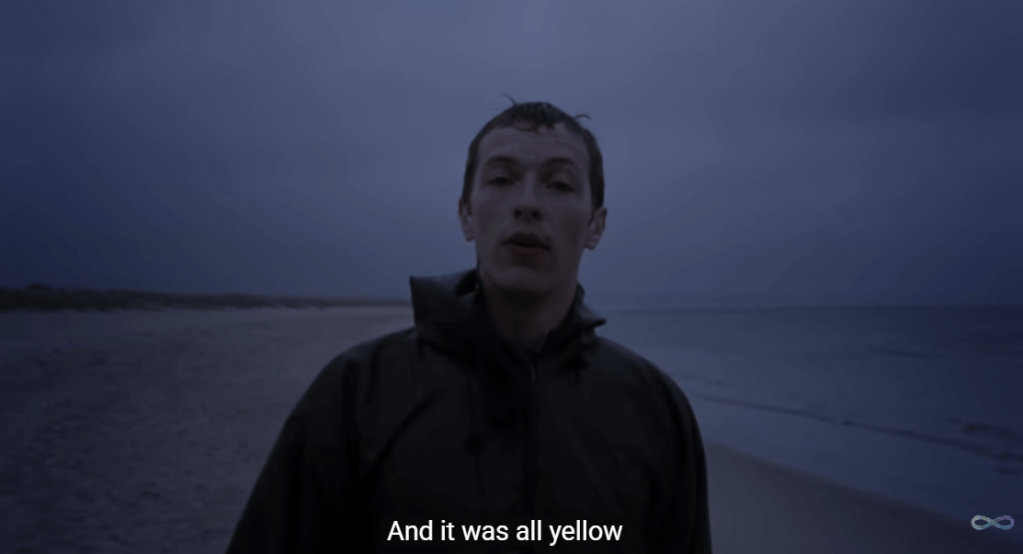
    Coldplay’s “Yellow” Music Video

    The music video for “Yellow” by Coldplay is simple but powerful. It shows lead singer Chris Martin walking alone on a beach in one continuous shot. The scene starts in the dark and slowly brightens as the sun rises, matching the song’s calm and emotional tone. Even though there aren’t many special effects or fast cuts, the soft lighting, the waves in the background, and the natural setting all help create a peaceful and reflective mood. The simplicity of the video makes the viewer focus more on the music and the lyrics.

    The song itself builds slowly, starting with a gentle guitar and quiet vocals. As it goes on, more instruments join in, and the sound grows stronger and more hopeful, just like the sky getting brighter in the video, proving how audio and visuals work together hand-in-hand. The line “Look at the stars, look how they shine for you” feels even more meaningful when paired with the real stars and sunrise on screen. The mix keeps Chris Martin’s voice front and center, while the background music and visuals blend perfectly to create a feeling of warmth, emotion, and sincerity.

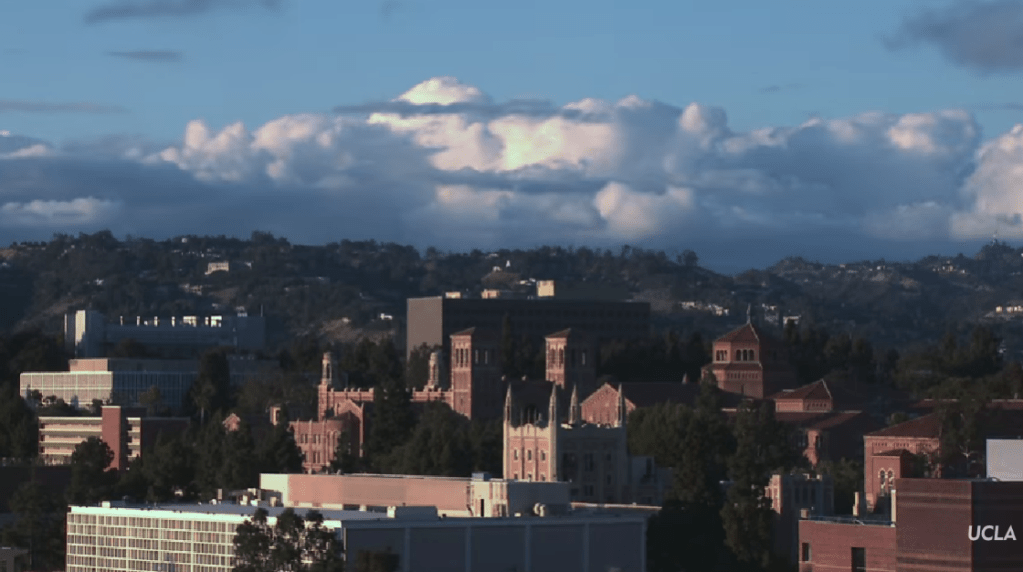
    “Welcome to UCLA!” Promotional Video

    The “Welcome to UCLA!” video starts with exciting shots of campus life: students walking to class, hanging out with friends, and quick shots of the school and LA. The video also highlights UCLA’s famous buildings and sunny weather, giving viewers a strong sense of what the campus feels like. In the background, upbeat music plays to match the energy of the visuals. The music is modern and happy, helping to build excitement without overpowering the voices or natural sounds. You can hear small touches like footsteps, laughter, and chatter, which make the video feel alive and real. When students or narrators speak, the music becomes softer so the words are clear and easy to hear.

    As the video continues, the pace of both the visuals and the music picks up. The editing becomes faster, showing more scenes of student activities, labs, and campus events. The background music builds with more instruments and a stronger beat, giving the feeling of movement and pride. Subtle sound effects, like swooshes between clips or cheering crowds, add extra energy to the scenes. The video ends on an inspiring note, inviting viewers to imagine themselves as part of UCLA’s community. Together, the music, sounds, and visuals create an emotional story that makes you feel the excitement and spirit of being a UCLA student.

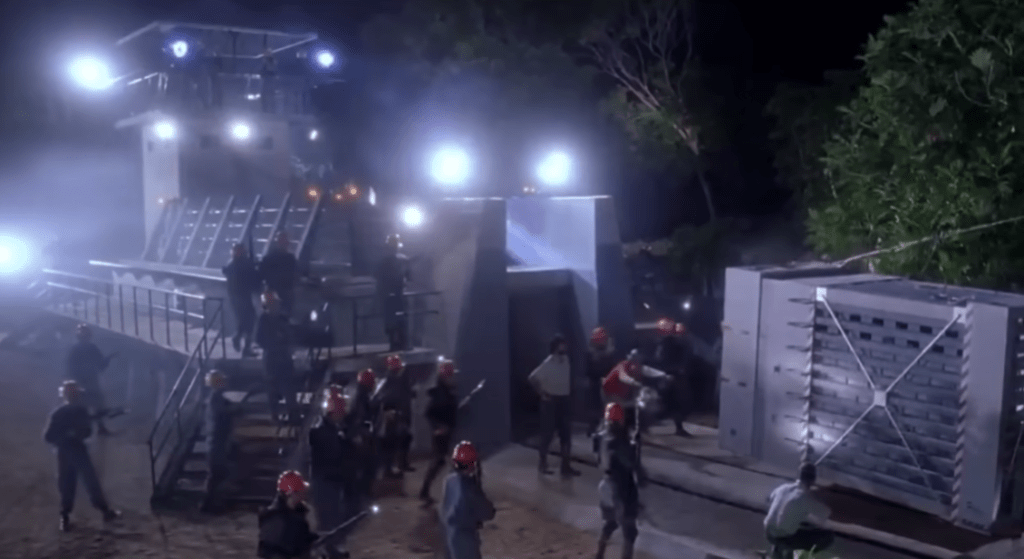
    Opening Scene of Jurassic Park: 1993

    The opening scene of Jurassic Park is a great example of how sound and visuals can work together to build tension. The scene takes place at night as park workers prepare to move a dangerous dinosaur into its enclosure. The lighting is dark and misty, and we can only see flashes of movement through shadows. The background sounds, including rustling leaves, animal growls, and the sound of metal chains, create an uneasy feeling. You can hear the workers’ voices shouting over the noise, mixed with the heavy breathing of the dinosaur. The sound design makes viewers feel like they are right there, unsure of what might happen next.

    When chaos breaks out, the background music swells dramatically. John Williams’ score rises with deep brass notes and quick percussion, matching the panic on-screen as the dinosaur attacks. The quick camera cuts, bright flashlight beams, and roaring sound effects combine to increase the tension. Even though the dinosaur isn’t shown in full, the powerful mix of sound and visuals makes the scene thrilling and suspenseful. This moment shows how sound can shape the emotion and intensity of the story.

    Through studying these examples, I learned that great sound design isn’t just about filling silence; it’s about shaping emotion, atmosphere, and rhythm. The right mix of sound effects and background music turns a simple recording into something memorable. These takeaways inspired me to think intentionally about how to use sound to bring my podcast to life.


    Create

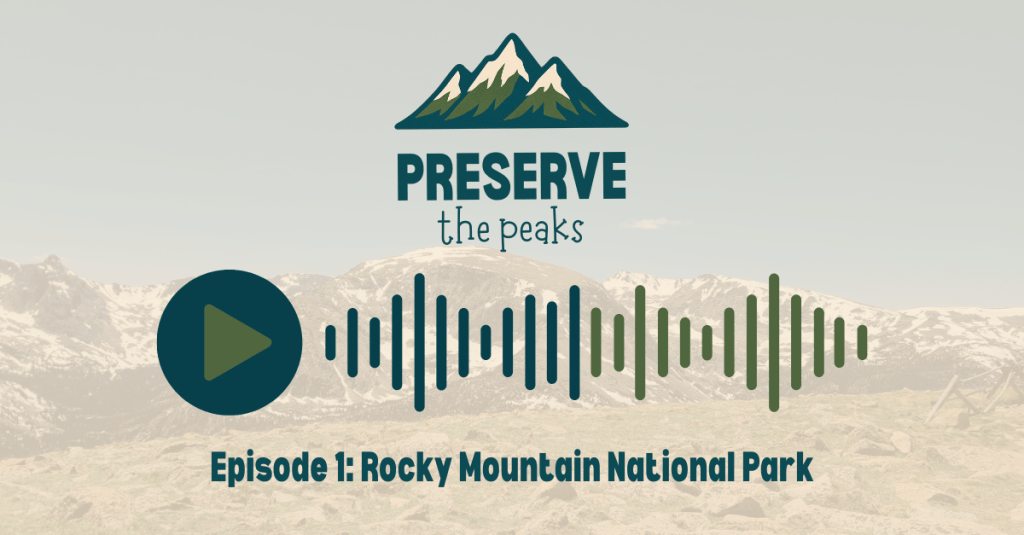
    Preserve the Peaks Episode 1: Rocky Mountain National Park

    After conducting research and planning my episode, it was finally time to bring Preserve the Peaks to life. Following Filippo Gaetaini’s advice, I started by creating a comfortable recording environment. I wanted to feel relaxed and focused, so I set up a small recording space using blankets to form a sound barrier around my desk. This helped reduce background noise and made my built-in HP Envy x360 microphone sound more professional. Once everything felt right, I hit record.

    The creative process began long before the final take. I revised my script multiple times, reading it out loud to make sure it sounded conversational and natural. I also recorded several practice takes to get comfortable with the pacing and tone. I found a balance between sticking to the script for structure and ad-libbing in certain parts, especially when I talked about my own visit to Rocky Mountain National Park. Mixing the two gave the episode more personality and warmth. And yes, I even wore my Rocky Mountain National Park t-shirt while recording to get in the zone, and it worked!

    When the narration was complete, I moved into sound design and editing. I used a mix of Adobe Audition and Premiere Pro to polish the audio, trim out moments of dead air, adjust volume levels, and rearrange clips where needed. I also experimented with layering different sound elements to make the story come alive. The episode opens with ambient audio of wind and birds to place the listener directly in nature, creating an immersive outdoor atmosphere. I added sound effects like a thunder clap, a drumroll, and an alarm clock buzzing at key moments to emphasize certain transitions and emotions.

    To shape the mood throughout the episode, I used two different background music tracks. For the opening and closing, I chose something cinematic and atmospheric, with a sense of hope and reflection. In the middle section, when I discuss the environmental challenges facing Rocky Mountain National Park, I transitioned to a darker, more intense track to match the tone of the message. This shift helped create contrast and tension, then resolved into optimism as I returned to the hopeful theme at the end, encouraging listeners to take action to protect our parks.

    Overall, recording and editing this podcast was such a rewarding experience. It combined everything I love into one project: storytelling, nature, and design. From setting the ambience and revising the script to layering music and sound effects, each step made me appreciate how powerful audio can be in creating emotion and connection.

  • Creating My Own Podcast

    Creating My Own Podcast

    This week, I explored the process of creating my very own podcast: from developing the concept and planning the structure to learning the ins and outs of sound, scripting, and delivery. Before hitting record, I wanted to understand what makes a podcast engaging and professional. That began with diving into several readings that covered everything from microphone techniques to scriptwriting strategies. Below are my key takeaways and reflections from each piece that helped shape my understanding of podcast creation.


    Readings & Writings

    The Bare Bones: Camera Course for Film and Video – Chapter 8: Sound

    By: Tom Schroeppel

    Sound might not be visible, but it’s one of the most powerful storytelling tools. In this chapter, Schroeppel emphasizes that sound waves are spherical, traveling outward from their source. He compares microphones to our ears, explaining how both detect differences in frequency and amplitude. Frequency determines pitch (measured in Hertz, or Hz), while amplitude determines loudness (measured in decibels, or dB).

    I found it fascinating how Schroeppel described the physics behind sound, like how each 3 dB increase doubles intensity, and how this translates to practical audio work. He also detailed microphone types and pickup patterns, which was extremely helpful as I thought about what equipment I might use for my own recording. Dynamic and electret condenser mics each have their advantages, and their pickup patterns (omnidirectional, cardioid, and supercardioid) determine how sound is captured in different environments.

    What resonated most was his advice on recording clean, separate tracks for dialogue, sound effects, and ambience. Recording 30 seconds of “presence” or background noise after a scene helps create smooth transitions. This reinforced how intentional every sound decision should be, not just for technical quality, but for crafting a listener’s emotional experience.


    “The Art of Creating an Invisible Podcast Episode Script”

    By: Kevin Anderson

    Kevin Anderson’s article reminded me that podcasting is as much about preparation as it is about performance. He encourages creators to script strategically, not word-for-word, but enough to give structure and clarity. The goal is to make your podcast sound natural and unscripted, even if it’s been thoughtfully written.

    Anderson calls this approach the “invisible podcast script.” It’s invisible because it blends seamlessly into the host’s delivery: the listener doesn’t hear the preparation behind the performance. His five reasons for writing such a script stood out to me: it gives structure, ensures flow, builds professionalism, boosts confidence, and saves time in production. I also appreciated his breakdown of key script sections, from the opening “Welcome to” to the closing call to action.

    The takeaway: write the way you speak. Anderson’s emphasis on storytelling, relatability, and authenticity is exactly the tone I want for my podcast.


    “Creating a Great Podcast Script: 3 Methods Top Podcasters Use”

    By: Colin Gray

    Colin Gray expanded on the topic of scripting by breaking it down into three practical methods: the Word-for-Word Script, the Detailed Episode Outline, and the Bullet Point Plan. I liked how he explained that each has trade-offs, from precision and confidence to flexibility and spontaneity.

    For me, the detailed outline approach seems ideal. It allows me to stay on topic while still speaking conversationally. The bullet-point method also intrigued me because of its freedom, but it requires strong improvisation skills. At the end of the day, it’s important to figure out which method works best for you and to practice your script before pressing record.

    Gray’s closing point stuck with me: no matter which format you use, the goal is to make your delivery feel natural and connected. This felt like a recurring theme across all the readings. Podcasting, like good communication, is about making your audience feel part of the conversation.


    “Podcast Taglines, Hooks, & the Power of Words”

    By: Kevin Anderson

    In this piece, Anderson shifts focus to branding and memorability. He highlights how powerful a tagline can be for building a podcast’s identity. A simple, catchy introduction like “Welcome to Steal the Show with Michael Port. This is Michael.” instantly connects with listeners.

    He explains a few formats, including the straightforward tagline, the two-step format, and the bio format, that are all designed to make a podcast recognizable and relatable. What I found particularly helpful was his advice to use “hooks” throughout episodes to keep listeners engaged. These hooks might introduce recurring segments, like “Question of the Month” or “Interview of the Week,” giving structure and familiarity.

    This reading made me think deeply about how I’ll introduce myself and my show. I want something short and memorable: a phrase that instantly reminds listeners what my podcast stands for.


    “Best Podcast Tools of 2025: Make, Market, & Monetise Your Show”

    By: Matthew McLean

    McLean’s article provided a variety of practical resources. He listed tools that simplify the podcasting process, from recording to marketing. Tools like Alitu and EditPoint (iOS app) streamline editing by removing filler words and silences, while Podpage makes building a podcast website effortless.

    I especially liked learning about the Samson Q2U microphone and the Zoom PodTrak P4 recorder, both tools that balance quality with affordability. Tools like Beehiiv for newsletters and the Podcast Host Planner for organization also showed how podcasting extends beyond recording: it’s about planning, branding, and growing a community.

    This article reminded me that podcasting is both an art and a system. Having the right tools can make creativity flow more smoothly and turn ideas into polished episodes.


    “Podcast Presentation Skills | Honing Your Speechcraft”

    By: Robert Cudmore

    Cudmore’s article tied everything together by focusing on delivery. His advice on pace, pitch, and confidence really stood out. He encourages podcasters to speak as if talking to a friend; to let their natural voice come through. I appreciated his reminder to breathe, avoid jargon, and not fear imperfection.

    I also loved his discussion of storytelling structures like the Hero’s Journey, The Mountain, and Start in the Middle. These frameworks help build tension, shape narrative flow, and keep listeners hooked from start to finish. His reminder to include a call to action at the end of each episode felt like the perfect full-circle moment; it’s not just about sharing your message but inspiring your listeners to take the next step.

    Cudmore’s advice made me realize that podcasting is ultimately about connection, speaking with your audience, not at them.


    Research to Inform

    Below are some examples of podcasts and commercials I researched to inspire the creation of my own podcast.

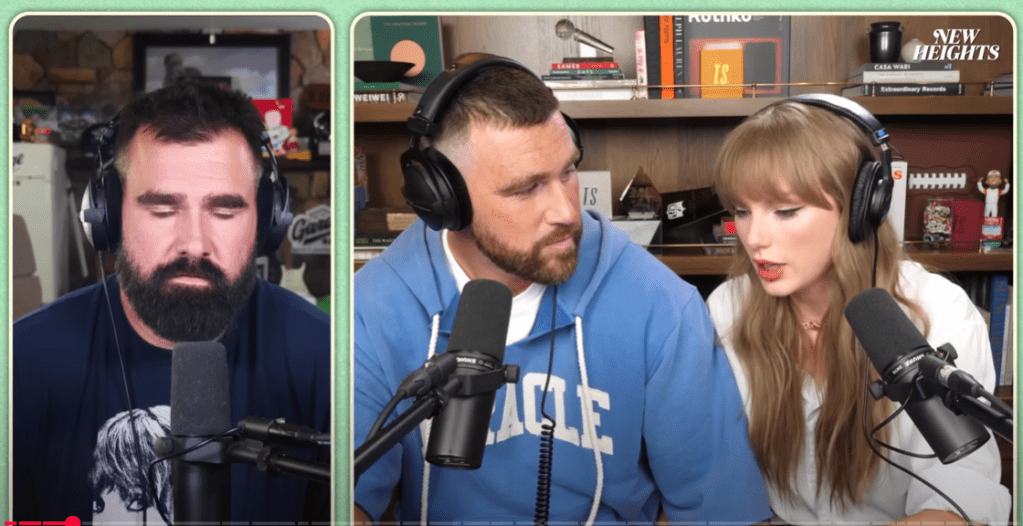
    1.) New Heights with Jason & Travis Kelce: Taylor Swift

    From a structure standpoint, this episode really shows how the Kelce brothers know their audience. It starts with their usual mix of sports talk and brotherly banter, setting that familiar, relaxed tone fans love. Then, bringing in Taylor Swift shifts things to a deeper, more personal story, one that still feels natural but adds a whole new layer of interest. The conversation is funny and loose at times, but it also delivers real substance through her reflections and album reveal. It’s the perfect blend of casual and meaningful.

    What makes it work is authenticity. Jason and Travis stay true to who they are, and that chemistry pulls listeners in while letting Taylor shine in her own way. On top of that, the episode nails the marketing side: teasing the guest beforehand, building excitement, and then turning the live stream into a record-breaking event.


    2.) How to Save a Planet: “Show We Mine the Deep-Sea?”

    This episode dives into one of the trickiest questions in climate science. The hosts ask, should we mine the deep sea for materials that power our batteries? It’s a big topic, but they make it approachable from the very start. Instead of throwing heavy science at listeners, they break things down through storytelling and curiosity. They bring in experts, explore both sides of the debate, and guide the audience through each step like you’re learning together. What really stands out is how they balance serious information with moments of humor and honesty. It feels less like a lecture and more like a thoughtful conversation with a friend who happens to know a lot about the environment.

    The structure keeps the episode easy to follow: start with a question, bring in perspectives, unpack the details, and end with a takeaway. The hosts never sound condescending: they speak with the listener, not at them. That sense of collaboration makes it feel empowering rather than overwhelming. For my podcast, this approach is gold: I can structure the episode around a big question and leave the audience with something they can think about or try themselves. It’s storytelling with purpose, and it makes complex topics feel human.


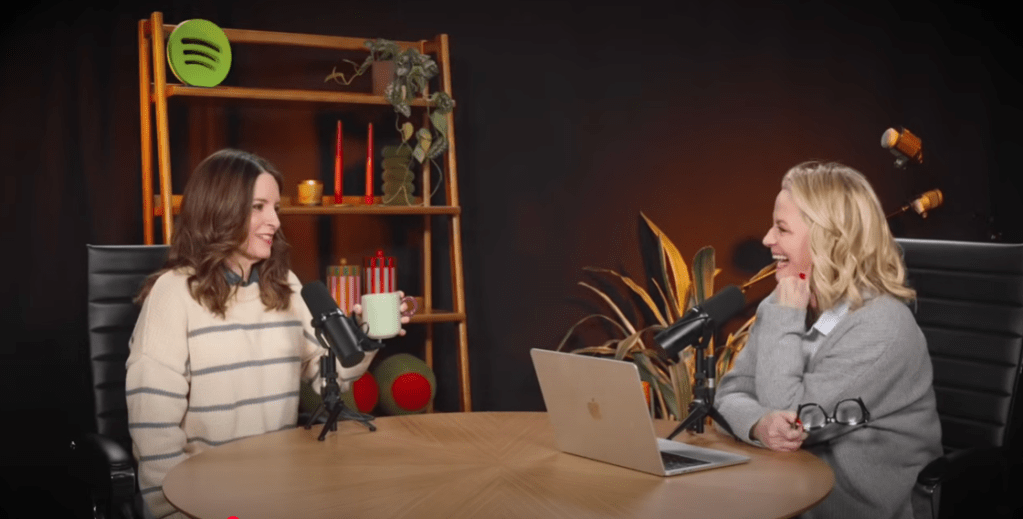
    3.) Good Hang with Amy Poehler: Debut with Tina Fey

    Amy Poehler kicks off her podcast exactly how you’d expect: with warmth, humor, and a dose of chaos that feels completely real. Having Tina Fey as her first guest sets the tone perfectly. From the first few minutes, it feels like you’ve walked into a coffee meet-up with two longtime friends. They joke, reminisce, and bounce off each other effortlessly, and that chemistry keeps you listening even when the conversation wanders. There’s no forced structure or formal intro; it’s just two funny, smart people talking about life and work in a way that feels unfiltered.

    That relaxed energy is what makes Good Hang so inviting. Amy makes it clear she’s not here to preach or “fix” anyone’s problems. She just wants to hang out and make people laugh. It’s a reminder that not every podcast needs to teach a lesson or follow a rigid outline. Sometimes, the magic is in authenticity and connection.


    Create

    Pre-Production Planning Documents

    When brainstorming ideas for my podcast project, two very different concepts came to mind, and they are both connected to topics I care deeply about but expressed in completely unique ways.

    The first idea, “Preserve the Peaks,” grew out of my previous campaign project about climate change and visitor impact in National Parks. This podcast would continue that mission by exploring how people interact with protected spaces, specifically Rocky Mountain National Park in this episode. I’ve already gathered research and statistics to build a strong call to action, encouraging listeners to follow Leave No Trace principles and take mindful steps to protect the environment when they visit. The biggest challenge will be making sure it sounds natural rather than scripted. I plan to overcome that through practice: recording, listening back, and re-phrasing until it feels like I’m having a genuine conversation with the listener.

    My second idea takes a totally different approach: “The Ballroom Breakdown.” This would be a fun, lighthearted show that recaps and comments on the latest episode of Dancing with the Stars. It’s conversational, cheeky, full of personality, and something that lets me bring my own voice and humor into the mix. While it’s less serious than Preserve the Peaks, it still allows me to build storytelling and audience-engagement skills. I wasn’t completely sure if it fit the project’s criteria, but I wanted to explore it because it reflects another side of my interests: pop culture, performance, and creative commentary. I think this would be a very fun podcast to create and explore further.

    To compare the two, I created mind maps and scripts for each concept, which can be viewed in the planning document linked above. This helped me visualize tone, structure, and content, and gave me clarity on how each could connect with an audience. Even though the topics couldn’t be more different, they both let me practice my voice, structure ideas effectively, and focus on engaging listeners. I’m excited to keep developing one of these into a full podcast episode!