Last week was all about planning: brainstorming ideas, writing a script, and finding the perfect background music and sound effects to set the mood. This week, it was time to hit record. After completing the pre-production process, I focused on turning my plan into a polished podcast episode. I edited my script several times, learned how to record clear, high-quality audio, and spent time experimenting in Adobe Audition and Premiere Pro to mix my voice, music, and sound effects together. It was a hands-on, creative process that helped me understand how all the pieces come together to tell a story through sound. Let’s dive into the steps I took this week to make it happen.
Readings & Writings
To kick off this week’s project, I started by reading “7 Secrets for Getting Pro-Sounding Vocals on Home Recordings” by Filippo Gaetaini. The article focuses on making high-quality vocal recordings with the tools you already have at home. Gaetaini shares practical tips that go beyond just having the right microphone: he emphasizes creating the right environment and mindset for recording.
One of the first tips is to get in the zone by setting the right ambience and making sure you feel comfortable while recording. Then, he suggests hacking your bedroom by using everyday items like blankets, curtains, or pillows to reduce echo and create a DIY vocal booth. He also explains how important it is to position your mic and pop filter correctly, keeping the microphone’s diaphragm facing your lips for the clearest sound.
Another key takeaway is to check your mic levels and let your mic warm up before recording. Gaetaini encourages recording several takes because your best performance might not come until the fifth, or even tenth, try. Finally, he reminds readers to be careful with editing and vocal processing. Too much editing can make a track sound unnatural, so it’s best to experiment until you find what feels right. These reminders made me realize that good audio isn’t just about technology; it’s about patience, practice, and finding a natural rhythm in your voice.
The second article, “Sound Advice: Editing Audio for Video” by Videomaker, explores how sound editing can elevate a video from average to engaging. The piece highlights how A-roll (the main footage) and B-roll (supplementary footage often used with voiceovers) work together to tell a story. The article also explains technical terms like insert edits, where new video is inserted into the main footage, and L-edits, or split edits, where the audio and video transition at different times for a smoother, more natural feel.
The article provides a clear process for editing audio in video projects: first import and assemble your main clips, then trim and refine your edit. After that, it’s important to listen carefully for choppy transitions, audio glitches, or uneven volume. If something still doesn’t sound quite right, adding background music can help mask small imperfections and enhance the mood. The article also recommends using post-processing techniques like light compression, limiting, and equalization to “sweeten” the final track.
Both readings helped me better understand how sound design shapes storytelling through voice, background music, and editing choices. They reinforced how much thought and care go into creating professional-sounding audio, even with simple tools.
Research to Inform
To better understand how audio can transform a story, I explored several examples that skillfully combine visuals with music, dialogue, and sound effects. Each example offered inspiration for how I could use sound to enhance my own podcast.
Coldplay’s “Yellow” Music Video
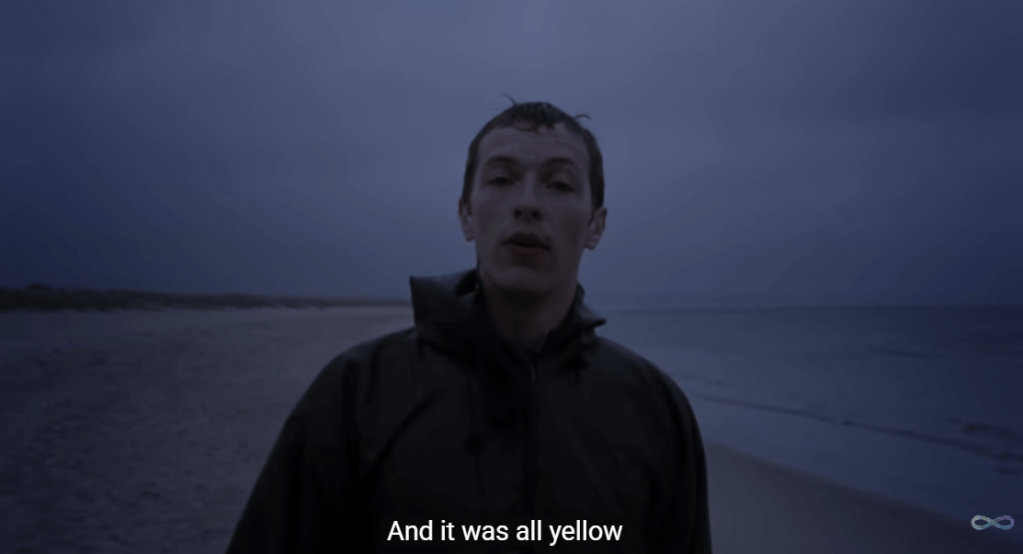
The music video for “Yellow” by Coldplay is simple but powerful. It shows lead singer Chris Martin walking alone on a beach in one continuous shot. The scene starts in the dark and slowly brightens as the sun rises, matching the song’s calm and emotional tone. Even though there aren’t many special effects or fast cuts, the soft lighting, the waves in the background, and the natural setting all help create a peaceful and reflective mood. The simplicity of the video makes the viewer focus more on the music and the lyrics.
The song itself builds slowly, starting with a gentle guitar and quiet vocals. As it goes on, more instruments join in, and the sound grows stronger and more hopeful, just like the sky getting brighter in the video, proving how audio and visuals work together hand-in-hand. The line “Look at the stars, look how they shine for you” feels even more meaningful when paired with the real stars and sunrise on screen. The mix keeps Chris Martin’s voice front and center, while the background music and visuals blend perfectly to create a feeling of warmth, emotion, and sincerity.
“Welcome to UCLA!” Promotional Video
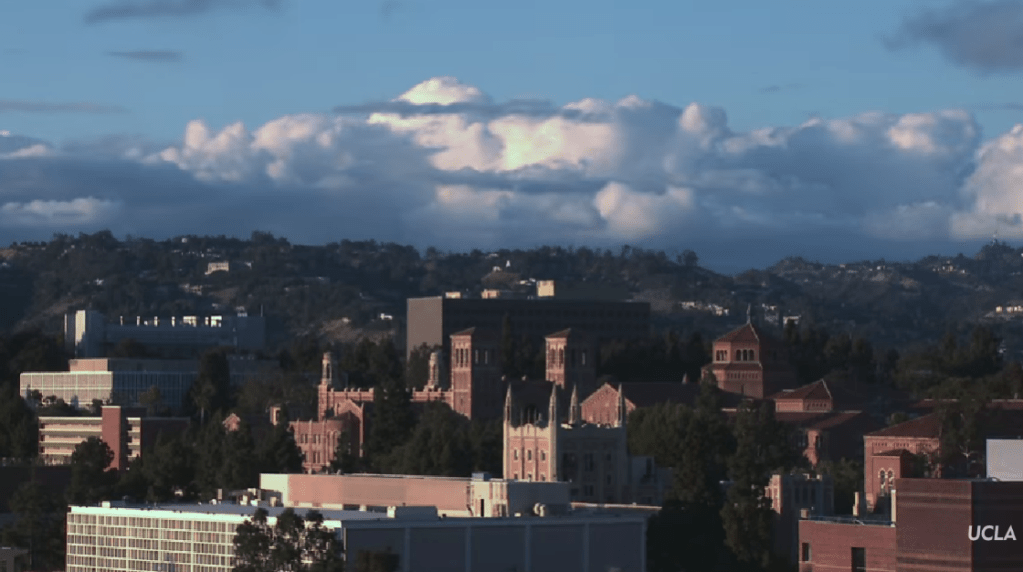
The “Welcome to UCLA!” video starts with exciting shots of campus life: students walking to class, hanging out with friends, and quick shots of the school and LA. The video also highlights UCLA’s famous buildings and sunny weather, giving viewers a strong sense of what the campus feels like. In the background, upbeat music plays to match the energy of the visuals. The music is modern and happy, helping to build excitement without overpowering the voices or natural sounds. You can hear small touches like footsteps, laughter, and chatter, which make the video feel alive and real. When students or narrators speak, the music becomes softer so the words are clear and easy to hear.
As the video continues, the pace of both the visuals and the music picks up. The editing becomes faster, showing more scenes of student activities, labs, and campus events. The background music builds with more instruments and a stronger beat, giving the feeling of movement and pride. Subtle sound effects, like swooshes between clips or cheering crowds, add extra energy to the scenes. The video ends on an inspiring note, inviting viewers to imagine themselves as part of UCLA’s community. Together, the music, sounds, and visuals create an emotional story that makes you feel the excitement and spirit of being a UCLA student.
Opening Scene of Jurassic Park: 1993

The opening scene of Jurassic Park is a great example of how sound and visuals can work together to build tension. The scene takes place at night as park workers prepare to move a dangerous dinosaur into its enclosure. The lighting is dark and misty, and we can only see flashes of movement through shadows. The background sounds, including rustling leaves, animal growls, and the sound of metal chains, create an uneasy feeling. You can hear the workers’ voices shouting over the noise, mixed with the heavy breathing of the dinosaur. The sound design makes viewers feel like they are right there, unsure of what might happen next.
When chaos breaks out, the background music swells dramatically. John Williams’ score rises with deep brass notes and quick percussion, matching the panic on-screen as the dinosaur attacks. The quick camera cuts, bright flashlight beams, and roaring sound effects combine to increase the tension. Even though the dinosaur isn’t shown in full, the powerful mix of sound and visuals makes the scene thrilling and suspenseful. This moment shows how sound can shape the emotion and intensity of the story.
Through studying these examples, I learned that great sound design isn’t just about filling silence; it’s about shaping emotion, atmosphere, and rhythm. The right mix of sound effects and background music turns a simple recording into something memorable. These takeaways inspired me to think intentionally about how to use sound to bring my podcast to life.
Create
Preserve the Peaks Episode 1: Rocky Mountain National Park
After conducting research and planning my episode, it was finally time to bring Preserve the Peaks to life. Following Filippo Gaetaini’s advice, I started by creating a comfortable recording environment. I wanted to feel relaxed and focused, so I set up a small recording space using blankets to form a sound barrier around my desk. This helped reduce background noise and made my built-in HP Envy x360 microphone sound more professional. Once everything felt right, I hit record.
The creative process began long before the final take. I revised my script multiple times, reading it out loud to make sure it sounded conversational and natural. I also recorded several practice takes to get comfortable with the pacing and tone. I found a balance between sticking to the script for structure and ad-libbing in certain parts, especially when I talked about my own visit to Rocky Mountain National Park. Mixing the two gave the episode more personality and warmth. And yes, I even wore my Rocky Mountain National Park t-shirt while recording to get in the zone, and it worked!
When the narration was complete, I moved into sound design and editing. I used a mix of Adobe Audition and Premiere Pro to polish the audio, trim out moments of dead air, adjust volume levels, and rearrange clips where needed. I also experimented with layering different sound elements to make the story come alive. The episode opens with ambient audio of wind and birds to place the listener directly in nature, creating an immersive outdoor atmosphere. I added sound effects like a thunder clap, a drumroll, and an alarm clock buzzing at key moments to emphasize certain transitions and emotions.
To shape the mood throughout the episode, I used two different background music tracks. For the opening and closing, I chose something cinematic and atmospheric, with a sense of hope and reflection. In the middle section, when I discuss the environmental challenges facing Rocky Mountain National Park, I transitioned to a darker, more intense track to match the tone of the message. This shift helped create contrast and tension, then resolved into optimism as I returned to the hopeful theme at the end, encouraging listeners to take action to protect our parks.
Overall, recording and editing this podcast was such a rewarding experience. It combined everything I love into one project: storytelling, nature, and design. From setting the ambience and revising the script to layering music and sound effects, each step made me appreciate how powerful audio can be in creating emotion and connection.

Leave a comment